Category Archives: Versatile Accompaniments

Jenny’s Spinach Pie

I ate this once last summer at Jenny’s and it was really quite nice.

So earlier today evening, when I happened to be in her kitchen as she made it for guests that she will have at lunch tomorrow, I noted down the quantities of the ingredients as she cooked.

It looked quite simple to put together, so I am going to try and make it some time soon.

Spinach Pie

2 rolls of store-bought pie crust

a kilo of frozen,very very finely chopped spinach

3-4 tablespoons of creme fraiche

a 210 gm bag of Gruyere cheese

salt and pepper to taste

1 large onion, chopped fine

1 egg, lightly whisked

De-frost the spinach and squeeze out all the water.

In a pan, heat a little oil and fry the onion for a while.

In a mixing bowl, combine the spinach, the onion, the seasoning, the cheese and the creme fraiche.

Place one of the pie crusts at the bottom of a pie dish. Fill with the spinach mixture and spread it evenly. Cover with the second pie crust.

Brush the top with the egg and bake at 175degreesC till done.

Leave a comment

Filed under Baked Main Meal Dishes, Easy One Pot Cooking, Quick Meal Ideas, Versatile Accompaniments

Warm Spinach and Fennel Salad

At the same hotel – the Sophia Country Club – where I had the avocado and orange salad, I also had a dish for lunch one afternoon which had a very new and unlikely – to me – combination of finely sliced fennel and spinach leaves.

The vegetables seemed to make up a sort of warm salad that included some kind of seafood.

I had only the vegetables from this dish, however, and the combination was surprisingly good.

I need to figure out now how they’d been cooked together.

Leave a comment

Filed under Quick Meal Ideas, Salads, Versatile Accompaniments

Tomato Chutney-a Desi -and nicer-Ketchup

The boulanger never wants a chutney/sauce to accompany the vadas, tikkis etc. that I make for his customers.  He doesn’t seem to think it is necessary and this is difficult for me to understand, used as I am to eating any finger food with a dip of some kind.

So yesterday, since he was to going to sell summer-inspired platters of salads and finger foods – he asked for both the khamang kakdi and the carrot salad with chicken tikkas, shami kebabs and batata vadas– I decided to give him some complimentary tomato chutney to serve on the side, for him to test the concept again.

This chutney is another bit of nostalgia from my childhood. In the summer months, dinner was often just this chutney and vegetable pulav with yogurt.

I love the flavor that comes from the use of paanchphoran here and of course that it is so easy to make is another plus.

As I made it yesterday, I thought this chutney would be so much nicer to have, with Indian starters such as pakoras and tikkis, than ketchup.

Tomato Chutney

3 large, ripe tomatoes

1 tablespoon of oil

1/4 teaspoon each of mustard seeds, nigella seeds, fennel seeds, cumin seeds and fenugreek seeds

salt and brown sugar to taste

Wash and chop the tomatoes very fine.

In a frying pan, heat the oil, then add the mustard seeds and the nigella seeds. When the mustard seeds start to pop, add the fennel seeds and the cumin seeds. When these start to brown, add the fenugreek seeds, fry for just a couple of seconds and put in the tomatoes.  Add salt and cook the tomatoes till they are completely soft. Add some sugar  (the chutney should be tangy, not too sweet), cook for another minute, then add water and simmer for a few minutes till the water is well-blended and the chutney is a little thick.

This chutney is a great accompaniment with puri and jeera-aloo, too.

Leave a comment

Filed under Dips,Chutneys,Sauces,Spreads, Easy One Pot Cooking, Versatile Accompaniments

Mint- and Coriander-flavored Grilled Chicken

This is another recipe adapted from “Tikkas & Kebabs”, one of the “Chef’s Special” series published by Lustre Press in India.

I have wanted to try this one since a long time because of the very clear memory I have of the delicious mint-flavored chicken tikkas I ate once  in a restaurant in Delhi.

The girls loved this dish, when I cooked it for lunch last Wednesday.  When I told the boulanger about it – I wasn’t able to take any for him to taste because the girls and I polished it all off – he seemed to like the idea of it and has agreed to try it one Tuesday soon, instead of the usual tandoori chicken.

10-12 chicken drumsticks

100 grams of yogurt

2 tablespoons of lime juice

1 tablespoon of garlic paste

3-4 teaspoons of ginger paste

1 teaspoon of cummin powder

1 teaspoon of coriander powder

1 teaspoon of garam masala

4 tablespoons of oil

1/4 cup of finely chopped fresh coriander leaves

2 tablespoons of finely chopped mint leaves

4-5 tablespoons of melted butter, for basting the chicken

salt to taste ( two teaspoons or a little less, for this quantity of chicken, works for us)

Mix the ginger and garlic pastes with the salt and lemon juice.

Skin the chicken, make 3-4 incisions on each piece, toss the pieces thoroughly in the lemon juice mixture and  leave them in this marinade for 30 minutes in a large bowl.

In the meanwhile, strain the water in the yogurt by leaving it in a fine sieve for 15-20 minutes.

Mix the rest of the ingredients – except the butter – in the yogurt. Add this mixture to the chicken pieces and coat them well in it. Leave the chicken in this marinade for at least 8-1o hours, turning over the pieces once during this time.

Heat the grill to about 240 degrees Celsius, then place the chicken on a wire rack and grill till done (this takes about 40 minutes in my oven), turning the pieces over a couple of times during this time to make sure they are evenly cooked and basting with butter each time.

I love the mild but distinctive flavor of herbs here.

Leave a comment

Filed under Baked Main Meal Dishes, Picnic Food, Starters and Snacks, Versatile Accompaniments

Potato-stuffed Bread Rolls

Last night, dinner consisted of exactly the same combination that Ma often made for dinner in the winter when we lived in Bokaro – vegetable soup, with these aloo-filled bread rolls on the side.

Ma never served these rolls on salad leaves, but I guess I felt that a few leaves from the bag of mesclun would stop me from thinking about the significant amount of oil which the bread must have soaked up when I fried the rolls !

I actually made these as a sort of  trial-run, since I wanted to take a couple to the boulangerie.

This is another of Pooja’s suggestions and has been a winner too.

Next week’s order from the boulanger is for these rolls and vegetable korma.

April 13th 2010

I did, as planned, hand over bread rolls and korma for 10 to the boulanger this morning. But I have spent the last few days wondering if  this has really been such a good idea, to introduce the girls to this snack (well alright,my own tendency to over-indulge once the rolls are made has been worrying me too).

The combination of bread and potatoes which is then deep fried is surely not a recipe for good health.  I did substitute white bread with multi-cereal bread but then commercial versions of the latter are not the real deal at all.

Then, in what must surely be a Sign, a news story that  highlights once again the problems with high glycemic index foods – of which potatoes and white bread are common examples -caught my eye first thing this morning.

http://edition.cnn.com/2010/HEALTH/04/12/glycemic.diet.heart/?hpt=T2
http://health.usnews.com/health-news/diet-fitness/diabetes/articles/2010/04/12/eating-the-wrong-kind-of-carbohydrates-increases-heart-disease-risk.html

So while I fried a few rolls – which have been hugely popular with the girls – this evening for gouter –  with the leftover potato stuffing, I decided that I am not going to include this particular recipe here.

They’ll just have to call me for this one, if they do remember these rolls when they are older. For my part, I am not going to make these again in a hurry !

Leave a comment

Filed under Picnic Food, Starters and Snacks, Versatile Accompaniments

Tandoori Chicken

Though what this is , actually, is oven-grilled chicken.

The girls  have always called it “red” chicken after the color of the excellent chicken that Jitender and Neelam always make at their barbeque parties and which Indira so looks forward to eating when we are invited !

The marinade – and therefore the taste of the chicken – I prepare is different from theirs though and is adapted from Sanjeev Kapoor’s recipe in his  “Khazana of Indian Recipes”.

Tandoori Chicken

800 gms of chicken drumsticks

1 or 2 teaspoons of kashmiri chilli powder

4 tablespoons of lime juice

200 gms of yogurt

4-5 teaspoons each of ginger and garlic pastes

3/4 teaspoon of garam masala powder

salt to taste

about 100 ml of melted butter

2-3 limes, cut in to wedges

Skin and wash the chicken, then make cuts in several places on each piece.

In a flat bowl, mix half the lime juice and Kashmiri chilli powder and toss the chicken pieces in this mixture. Keep aside for 30 minutes.

In the meanwhile, leave the yogurt in a very fine sieve – to drain the whey – for 15-20 minutes.

Then mix the yogurt with the rest of the ingredients (except the butter),  toss the chicien pieces in this marinade to coat them well and refrigerate for 6-8 hours.

Pre-heat the grill to 240 degrees C, then place the chicken pieces at the top of the oven and cook till they are done, turning them over a couple of times so that all the sides are cooked evenly. Apply butter lightly with a brush each time on the surface just below the grill.

This dish is best eaten hot from the oven and lime wedges are a must-have accompaniment, for the juice to be squeezed on to each piece as it’s eaten.

Leave a comment

Filed under Baked Main Meal Dishes, Picnic Food, Starters and Snacks, Versatile Accompaniments

Mangori – Green Moong Daal Vadas

This is another great dish that I learned to make from Atto.  On our visits to her home in Indore, I used to look forward to eating these – which she made each time – hot and crispy as they came out of the karahi.

These vadas have always been very popular whenever I have made them for get-togethers with friends here so when Pooja suggested I make these for the boulangerie, I thought that a great idea.

And indeed, the boulanger simply loved the mangoris I took for him to taste a couple of days ago.

So this is one of the things I’ll make for next week’s order, along with some vegetable biryani and tandoori chicken.

This recipe is adapted from Atto’s.  I also  add fennel seeds as Pooja does since this adds a wonderful flavor.

Mangoris

1 cup of whole green moong daal (or split/chilka moong)

1/4 teaspoon of fenugreek seeds

1 teaspoon of ginger paste

1 onion , chopped very fine

3 teaspoons of fennel seeds

1 and a 1/2 teaspoons of salt (or to taste)

oil to deep fry

Soak the lentils with the fenugreek seeds in 3 cups of water for at least 12  hours. then drain the water and grind the daal with as little water as possible to a smooth paste. Take this out in to a bowl and mix in the salt, the chopped onion, the fennel seeds and the ginger paste.

Heat about 400-500 ml of  oil in a deep frying pan till it almost reaches smoking point. Drop small portions of the batter – about 1 or 1/12 teaspoons each – to the oil and fry  the vadas till they are brown – they will be need to be darker than a golden brown so as to be well-cooked inside – and crisp.

These are delicious enough by themselves; coconut chutney on the side would be the icing on the cake.

Leave a comment

Filed under Picnic Food, Starters and Snacks, Versatile Accompaniments

Tuna and Potato Cutlets

I first tasted these delicious fish cutlets at a potluck meal to which Jinia brought this dish as one of the starters.

I got the recipe from her when I made them for a “Cuisine de Monde” day at school when Indira was in the maternelle.   She had suggested that I make these, when I discussed the event with her, because in her experience, she said, this was a popular finger food with kids. And she was right about that – most of the children loved them, I remember, as did the mothers who were there.

I hadn’t made them again since then, but today as I mixed a salad for lunch and added some canned tuna to it, I was reminded of these cutlets. So I thought that instead of racking my brains trying to think of another potato-based dish for the boulangerie – since I don’t feel like making aloo tikkis or batata vadas again next week but potatoes do seem to be popular – I would make these cutlets, with the rest of the tuna in the can I opened this afternoon, for the girls’ gouter and take a couple of them to the boulangerie for Patrick to taste.

The girls, especially Noor, liked them a lot; I’ll find out tomorrow whether these will be part of the order for next Tuesday.

Tuna and Potato Cutlets

For 10 small cutlets –

90 grams of tuna (packed in water), drained

3-4 small potatoes

1 small onion, chopped fine

1/2 teaspoon of cumin powder

1/2 teaspoon of coriander powder

salt to taste

1/2 red chilli powder (optional) or 1 small green chilli, chopped fine (optional)

1 and a 1/2 tablespoons of cooking oil

2 eggs, whisked in a deep bowl (in which the cutlets can be dipped in to the egg)

6-7 tablespoons of breadcrumbs

Enough oil to deep-fry the cutlets

Boil and then peel the potatoes. Drain the tuna and break up the flesh with a fork. In a small frying pan, heat the oil, fry the onions till they are translucent, then add the tuna and cook for a just a little while till it is dry. Mix in the spices and cook for another minute, then take off the heat.

When the tuna is cool, mash in the potatoes and mix everything together thoroughly. Form 10 cutlets from this mixture. Dip them in the egg, then roll in the breadcrumbs and deep-fry till they are golden brown.

This really does transform plain, canned tuna in the nicest way.

Leave a comment

Filed under Picnic Food, Starters and Snacks, Versatile Accompaniments

Rava Upma

Like poha, the girls have loved to eat upma since they were babies.

For me, it is a convenient option as it is one of those easy to cook and all-in-one meals – carbs plus vegetables plus some protein from the lentils.

This is what we had for lunch today, with yogurt on the side, clementine juice and then fresh pineapple – which Indira prefers to the canned variety – for dessert.

Though coconut chutney and/or sambhar are the ideal accompaniments for upma, I sometimes eat mine with ketchup – a habit acquired in childhood.  Ma has always made the most delicious upma and it was probably sacrilege to smother its’ flavors in ketchup but back then it was the way Bittu b. and I enjoyed eating it most !

Rava Upma

1 cup of suji/rava/semolina

1 medium-sized onion

2 small carrots

1/4-1/2 cup of frozen green peas (less or more, as you like it)

1 small tomato

1 dry red chilli, broken in two

1/2-3/4 teaspoon of mustard seeds

2 tablespoons (or a little less) of yellow split pea lentils (chana daal)

6-8 curry leaves

2-3 tablespoons of sunflower oil, 1/2 of ghee

Roast the semolina in a warm pan for a few minutes till the grains start to turn a very light brown – at this stage there is a very distinct aroma.

In the meanwhile, in another large frying pan, heat the oil a little and add the mustard seeds. When these begin to crackle, add the curry leaves, the chana daal and the red chilli halves. Roast the daal till it begins to turn a light brown, then add the onions. Cook these for a little longer than when they turn translucent,

2 Comments

Filed under Breakfast Ideas, Easy One Pot Cooking, Quick Meal Ideas, Starters and Snacks, Versatile Accompaniments

Sun-Dried Tomato Tapenade

The paste I wrote about here earlier today would also make a great spread, to serve with bread as an aperitif.

It would be nice as a relish too, with oven-baked potatoes, say, or grilled chicken.

Leave a comment

Filed under Dips,Chutneys,Sauces,Spreads, Versatile Accompaniments

Chickpeas Salad aka Chickpeas Sundal

This is one more Indian recipe that is easily passed off as a salad.

I love how the chickpeas work here equally well with a variety of fruits – I sometimes add mango, or peach when it is in season, and tonight I added finely chopped orange segments.

We had this sundal for dinner tonight with tomato-pumpkin-broccoli soup and some nice multi cereal bread from the boulangerie.

Chickpeas Salad or Chickpeas Sundal

1 can of chickpeas, drained well

3-4 tablespoons of freshly grated coconut

1 mandarin orange, peeled and divided in to its’ segments(or 1 peach, peeled and diced fine, or an equivalent amount of diced mango)

1 large sprig of curry leaves

1 teaspoon of freshly grated ginger

1/2 a teaspoon of mustard seeds

salt to taste

Indira thought tonight, at first glance, that the fruit in the salad was pineapple. Which has given me the idea to try it with that fruit the next time.


Leave a comment

Filed under Easy One Pot Cooking, Picnic Food, Quick Meal Ideas, Salads, Starters and Snacks, Versatile Accompaniments

Baked Parsnip Chips

The first time I came across this vegetable was at a Christmas PTA lunch two years ago at the home of one of Indira’s classmates. The hostess provided these chips as one of the starters and I really loved their sweetness and almost herby flavor.

But then I overheard some of the French teachers at the lunch say to the lady jokingly that in France this vegetable is considered good only for horses 🙂 Since then, I have also heard people say it is “pig food”  though in England and some other countries it is in fact a common “people food ” as they eat it steamed/boiled/fried/baked or added to soups.

The very distinctive taste of those chips has stayed with me so when I spotted parsnips (panais in French) for the first time in Carrefour recently, I bought some.

This is what we are having  for dinner tonight, with a vegetable soup and garlic bread.

To see what parsnips look like(imagine a large, cream/beige carrot) check here

Baked Parsnip Chips

Two large parsnips (about 500 grams), peeled and cut in to slices, hard core removed

3 tablespoons of olive oil

salt and pepper to taste

Put the parsnip slices in a large mixing bowl, season lightly with salt and freshly ground black pepper. Add the olive oil and toss everything together well.

Spread the slices on a baking tray in a single layer and bake until done (at least 25 minutes) at the top of the oven, at 200 degrees C.

As it turned out, Indira did not take to these tonight, just as she did not like the sweet potato chips too much. But the rest of us polished off the lot 🙂

The herb-like taste and aroma that I felt I noticed may be because this vegetable apparently belongs to the Umbelliferae family, whose other members include carrots, coriander, parsley, fennel, cumin, dill etc.

2 Comments

Filed under Baked Main Meal Dishes, Easy One Pot Cooking, Quick Meal Ideas, Starters and Snacks, Versatile Accompaniments

Steamed Salmon

This recipe is the same as for steamed trout, but Indira loves salmon cooked this way so much – and she certainly prefers it to the trout – I thought it deserves its own post.

Though Noor informed me a couple of days ago that she still prefers her trout/salmon to be grilled with pesto, so I must remember to make it like that for her next time, instead of steaming the fish yet again 🙂

astoramachipsvihaanaloovadas 037

Steamed Salmon

Salmon fillets

1 tablespoon of fresh rosemary

sea salt to taste

a few slices of lime

Sprinkle the salt on the salmon, spread the rosemary, then place the slices of lime on top.   Fill some water in the bowl of the steamer and set it to heat. Now place the fillets in the basket of the steamer and cook the fish till it is done.

Eat this hot, squeeze some more lime  if you like after breaking up the pieces of fish a little.

Just delicious.

4 Comments

Filed under Easy One Pot Cooking, Quick Meal Ideas, Starters and Snacks, Versatile Accompaniments

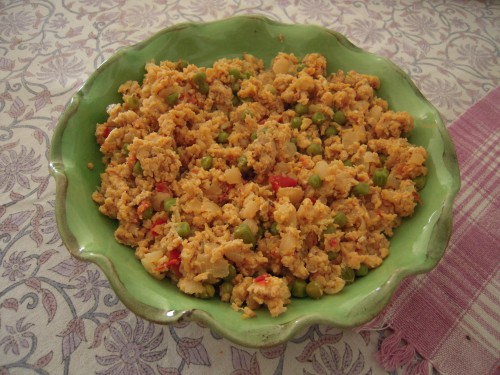
Desi scrambled eggs – Egg Bhurji

A desi version of scrambled eggs, this is a really versatile dish.

It makes for an indulgent Sunday breakfast, with toast and butter or even baguette and cheese and I make it for dinner  too sometimes, to go with soup, in the winter.  And the leftover portion is always good for a sandwich filling the next day, with a little ketchup tossed in 🙂  Shri and the girls really enjoy this dish and I am glad about that as it is one of those things that is so easy to make .

astoramachipsvihaanaloovadas 023

With or without the peas or green bell pepper, this is a delicious way to eat eggs.

Leave a comment

Filed under Breakfast Ideas, Easy One Pot Cooking, Picnic Food, Quick Meal Ideas, Versatile Accompaniments

Baked Sweet Potato Chips

I just love the color of these.

Sweet potato is a vegetable that always brings back memories of holidays in my grandparents’ village in Rajasthan. If I remember the process right – Biji, my maternal grandmother, would leave whole sweet potatoes (shakarkandi in Hindi) in the coal/wood-fired angeethi in her kitchen overnight, and the dying but still hot embers would cook it to perfection by the next morning. I remember we’d eat them straight out of the angeethi, without adding anything and I just loved that smoky, sweet taste.  Which is why I never did take to the chaat that many people, including my mother, make with this vegetable since it  involves adding lime juice to the cooked cubes of sweet potato. That spoils the natural sweetness of the vegetable, IMO.

But ever since I ate baked parsnip chips at a school mums’ lunch once, and baked sweet potato fingers at Jenny’s some months ago, I have been thinking I ought to try and bake sweet potato too, since I discovered that this way of cooking also brings out the vegetable’s wonderful taste and sweetness.

I had been forgetting to get around to it though so Shri – he loves those old-style roasted sweet potatoes too –  decided,I guess, to take matters in to his own hands and bagged a couple of sweet potatoes one day some weeks ago when he was shopping with me, saying  “these are for roasting/baking”

Well I am glad he did – these chips were yummy 🙂

astoramachipsvihaanaloovadas 036

Sweet Potato Chips

2 sweet potatoes

2 tablespoons of sunflower oil

some sea salt to taste

Peel the sweet potato and cut in to 5 cm thick slices. Sprinkle the salt on these and leave for 5 minutes. In the meanehile heat the oven to 22o degreesC. Now add the oil to the sweet potato slices, toss well, spread in a single layer on a baking tray and cook at the top of the oven till they are soft (they will cook quicker than regular potato chips). Turn over once, halfway through cooking.

Really nice, loads of natural flavor. We had them with steamed salmon and  olive bread.

Leave a comment

Filed under Starters and Snacks, Versatile Accompaniments

Prawn Balchao

This  recipe,  like the sabudana vadas, is courtesy Chef Sanjeev Kapoor of “Khana Khazana” fame.

When we discussed the recipes in one of his books a couple of months ago, Rakhi reccomended that I make this one.

I made it with balsamic vinegar as I didn’t have any other kind at home, but Rakhi had assured me  that the dish would not suffer on this account.

And indeed, just as she had told me, this is truly yummy, and brought back memories of the great balchao Boudi and B.’s Goan neighbor in Khar used to make at home and share with us.

Indira loved the masala and had some with rice, though she did find it too hot to have more than just a little.

tabboulehbalchaocactus 010

Prawn Balchao

Leave a comment

Filed under Curries, Versatile Accompaniments

Sabudana Vadas

It was Indira’s birthday last Sunday and after a good lunch at the Petite Provencale and a very fun afternoon at  Aquasplash in Antibes, we came home to a dinner of sabudana vadas and the tomato-avocado-pesto sandwich that is Indira’s current favorite thing to eat.

These vadas may not be quite like the original – and I fried them a little too long this time I think, so that some were a little too crisp – but they do satisfy my craving for this food. I remember all the train rides from Mumbai to Pune when I traveled between those cities on work – I used to look forward so eagerly to the vendors bringing around hot, crispy sabudana vadas !

pastatroutwheatberries 012

For about sixteen small vadas

3/4 cup of sabudana (sago pearls)

2 medium sized potatoes

1/2 a cup of roasted, roughly crushed peanuts

1 (or 2) green chilli, chopped fine (optional)

1 tablespoon of fresh coriander leaves, chopped fine

1/2 a tablespoon of lemon juice

salt to taste

enough oil – at least 400 ml – to deep fry the vadas

1 teaspoon of fresh, grated ginger(optional as well; the reason I put this in most things I cook is because I trust my Ma’s notion that ginger improves the digestion of pretty much any food. And since these vadas combine two starches – sago and potatoes- they are a prime candidate for this ingredient I feel)

Soak the sabudana, in just enough water to cover it’s top, for 3-4 hours. At the end of this time, the sabudana will have typically soaked in all the water; else drain any excess water (though this is unlikely to occur if you use only enough water to cover the sago pearls)

In the meanwhile cook the potatoes  in the microwave oven (this way there will be no risk of their becoming sticky or retaining any water, which can cause the vadas to break) then after they have cooled peel their skins off and mash them in a bowl.

Add the rest of the ingredients, combine everything well and divide the mixture in to four equal portions. From each of these, make 4-6 equal sized balls and flatten them by pressing gently between your palms.

Fry the vadas in medium-hot oil till golden brown (so a little less brown than the ones in the picture).

On a rainy day, this is heaven.

Leave a comment

Filed under Picnic Food, Starters and Snacks, Versatile Accompaniments

Pretty Pasta Salad !

This is a personal favorite, one that I would love to make more often except I know that the rest of them prefer their pasta with sauce – unless it is au nature, with just some olive oil, which is the way the girls love it.

But they eat this without fuss as well, though with a lot of Parmesan cheese grated on top.

When I made it a few days ago the salad looked so pretty, sitting there so full of color, that I just had to take a picture, much to Indira’s amusement.

pastatroutwheatberries 007

Pasta Salad

There is enough here for 6.

Tricolor pasta, preferably the whole wheat kind – 200 gms (dry weight)

one large orange bell pepper, sliced quite fine

3 tomatoes, diced in to chunks

1 can of sweet corn (drained weight 140 grams)

some salad leaves, any kind (green as well as the ones with some  purple as they add so much color)

salt and dried basil to taste

3-4 tablespoons of olive oil and 2-3 tablespoons of lime juice for the dressing

Cook the pasta till it is done. In the meanwhile, assemble all the other ingredients except the salad leaves, season with salt and basil, pour the olive oil and lime juice evenly all over and toss everything well. When the pasta is done, drain and then cool it a little, before mixing it well with the other ingredients. Now add the salad leaves, and toss the salad a couple of times and leave it to rest for a while so that all the flavors mingle.

I love to eat this dish with a little drizzle of chilli-flavored oil and some freshly grated Parmesan.

This salad is a good picnic meal as well, like the wheat berry salad.

2 Comments

Filed under Easy One Pot Cooking, Picnic Food, Quick Meal Ideas, Salads, Versatile Accompaniments

Wheat berry Salad

This salad is excellent picnic food and I make it to take with us sometimes when we go out for the day.  But I do make it quite often otherwise too. Shri likes to take it for lunch so this is what the girls and I had for lunch too, yesterday, with the steamed trout.

pastatroutwheatberries 021

Wheat berry Salad

Wheat berries – 125 gms

Chickpeas – 1 can (drained weight 200 grams)

Sweet corn – 1 can (drained weight 140 grams) or a little more if you like

Frozed or fresh green beans – I do this by approximation; enough for a salad for 6

Tomatoes – 2 large or 3 small, diced (in to chunks not too small)

salt to taste

Pesto – again, approximate as per taste ; use just enough to coat the salad ingredients well, say 4 tablespoons but not too much

(I always leave the pesto out near the cooking surface for a while because most bottled varieties tend to be quite thick to begin with but actually contain a lot of oil, so they become a little more fluid this way, which makes me feel I am able to use less than I would otherwise.  I may be wrong about this but that is what I hope is happening !!)

Snap the frozen beans in to 1 inch or 1 and half inch long pieces and place these in a steaming basket/container. Bring a large quantity of water in a sauce pan to boil, add the wheat berries and cook them till they are soft enough for you. As the wheat berries cook, steam the beans till they are soft (but not so much that they are easily squashed; they will cook well before the wheat berries are done) on top of the same saucepan.

In the meanwhile put all the other ingredients except the salt in a large bowl. When the beans are done, cool them and  add them to the bowl, sprinkle some salt on top and mix everything well.

Drain the wheat berries when they are done, allow them to cool (else I tend to think the heat will soften the tomatoes too much, making the salad kind of mushy) and toss with all the other ingredients.

This is light and delicious, a great salad any time of the year.  Noor and I love it with cherry tomatoes instead of the regular kind. Grated carrots work well too.

Leave a comment

Filed under Picnic Food, Quick Meal Ideas, Salads, Versatile Accompaniments

Steamed Trout

Fish is one of those things I strangely cannot remember having watched my mother cook when I lived at home, though we had fish curry quite often  as both she and my father loved this dish and a friend of my father’s would often bring us delicious fresh water fish from his village that was not far from where we lived in Bokaro. And although Boudi, who is an excellent cook, makes the most delicious fish curries including Bengali cuisine classics such as bhapa maach and doi maach, I somehow never paid attention, when she was in the kitchen making one of those dishes, either. So each time I go back now to Mumbai for a holiday I tell myself that I am going to learn from her to cook one of those dishes. I never seem to get around to it though.

So fish has remained something that I don’t really know much to do with, which is the reason I either toss canned tuna or salmon in to pasta sauce or salads, or grill fresh fish as I learned to do a few years ago.  It is only recently that I have finally started to make a basic fish curry once in a while, and the girls do enjoy it.

And then this last Saturday we ate at the home of Doris and Jean-Luc, the parents of Indira’s childhood friend Celine and Doris made some excellent steamed white fish that Indira really loved. Luckily Doris cooked the fish after we arrived, so I was able to watch the process for myself. It is such a simple way to cook fish,  and so healthy too,  it made me regret that I hadn’t tried it all these years , especially when the girls were babies when it would have been so light and nutritious a meal for them.  Anyway…

So today for lunch I steamed trout, which Indira said, in her droll way, was “deliceuse !”

Noor was very satisfied with her lunch too, but then we had the fish with a salade de ble (made with wheat berries) which she loves, so it might have been that which worked for her.

Here’s my variation on the way Doris cooked the fish :

pastatroutwheatberries 016

Steamed Trout

Trout fillets

1 tablespoons of fresh rosemary

salt to taste

lime juice – enough for a liberal sprinkling over the fish, say 2 tablespoons, or a few slices of lime

Sprinkle first the salt, then the lime juice over the fish fillets(or place the slices of lime on top of the fillets).   Fill some water in the bowl of the steamer and set it to heat. Now spread the rosemary on top, place the fillets in the steamer and cook the fish till it is done.

Eat this hot, squeeze some more lime  if you like after breaking up the pieces of fish a little.

This preserves all the natural taste and sweetness of trout and, once again, a process tout simple.

Leave a comment

Filed under Easy One Pot Cooking, Quick Meal Ideas, Starters and Snacks, Versatile Accompaniments

Garlic Bread

Inspired by Shefali, I have started to make garlic bread at home finally. Shri misses the frozen kind we used to buy in HongKong from Delifrance, which one could just toast/grill at home with delicious results.

Here is the way I have been making it recently, which he as well as the girls like quite a lot.

Now if I could only remember to pull it out of the oven in time, instead of letting it go from being just the right crispness to bordering-on-burnt each time …

pics-on-camera 644

Garlic Bread

One fresh baguette, sliced in to 1inch (or a little more)  wide pieces

Butter (about 5-7 teaspoons for this much baguette, though more would be definitely nicer)

1 large pod of garlic, grated

salt (just a little, say 1/2 a tsp or even less, as the accent should be predominantly of the herbs)

3/4 tsp of dried oregano flakes (vary this as you like)

1/2 tsp each of dried basil and thyme flakes (vary this too as you like)

Mix the garlic and seasoning in to the butter and leave it for a little while so that all the flavors are well-absorbed.

Spread a little butter on each side of the baguette pieces, then grill these at 200 degrees C in the middle of the oven for a few minutes on each side till they are done.

Et voila ! That is so simple, I wonder why I never tried it before – so a big thanks to Shefali for the inspiration.

I must try not to make it too often though – this is a very indulgent experience, with all that butter  🙂

Leave a comment

Filed under Breads, Starters and Snacks, Versatile Accompaniments

Potato Salad with Lemon and Chive Vinaigrette

At one point during these summer holidays, I found myself utterly exasperated with cooking the same things again and again. I happened to mentioned this to Jenny and told her that I was in desperate need of recipes that would be quick to cook and suited to the weather in terms of the cooking effort (low) and style (light, non-greasy, not spicy).

At this she was good enough to loan me, among other recipe books, her copy of Delia Smith’s ” Summer Collection”.

That’s where I found the recipe for this salad. When I made it last week  Indira liked enough to say “You should definitely make this again !”

I have made some changes to the original; here is my version.

pics-on-camera 649

Potato Salad

6oo grams of potatoes, cooked in the microwave till they are soft, then peeled and diced (not too small) soon after you take them out

3-4 spring onions, trimmed and chopped small

2 tablespoons of fresh chives, snipped fine with scissors

For the vinaigrette

1 or 2 tablespoons of fresh, chopped mint

3-4 tablespoons of lemon juice

grated zest of one small lemon

3 tablespoons of olive oil

1 teaspoon (or a little more if you like more of this flavor) of grain mustard

1 clove of garlic, grated

rock salt, to taste

freshly milled black pepper, to taste

Combine all the ingredients for the vinaigrette then pour it on to the potatoes while they are still quite warm (the original recipe therefore requires that baby potatoes be used. Cook these with the skin on and add the dressing as soon as the potatoes are done, after draining the cooking water) and mix well.  Add the spring onions and the chives next, and mix the salad again a couple of times.

This is simple and delicious, with lots of subtle flavor.

2 Comments

Filed under Easy One Pot Cooking, Picnic Food, Quick Meal Ideas, Salads, Versatile Accompaniments

Green Beans with Coconut or Beans Poriyal

I once passed off – successfully so – this very Indian subzi as a salad.

Either way, it is really fresh and light and  just great to eat in the summer.  And while it does take some time to dice the beans, the cooking part is so easy that it makes up for the longer prep time.

I love to eat it with sambhar and rice, or with phulkas and yoghurt. Or just mixed in to plain, hot rice, as Indira likes it too.

The recipe here is based on my memory of eating it in the homes of Tamilian friends and of watching one of them cook a similar dish once with very finely sliced cabbage. I believe vegetables cooked in this way are called poriyals.

pics-on-camera 682

Green Beans with Coconut

400 grams of fresh green beans, washed, ends trimmed and diced quite small

1-2 tablespoons of sunflower oil

salt to taste

1 large dry red chili, broken in to two parts (optional though this spice adds a great flavor)

a pinch of asofetida (optional)

1/2 a teaspoon of mustard seeds

5-6 curry leaves

1/2 a teaspoon of coriander powder

2-4 tablespoons of fresh, grated coconut

2 tablespoons of chana (yellow split peas or black gram) dal though this too is optional

In a frying pan, heat the oil to a moderate temperature, then add the asofetida and the mustard seeds and fry till the seeds start to crackle and pop. Add the curry leaves and the red chili and fry for a few seconds. Now add the beans and mix well with the other ingredients. Cook uncovered for 3-4 minutes, turning over the beans a couple of times, then add  1/4 of a cup of water -maybe a little less, maybe a little more, depending on how fresh and soft or tough the beans are – and salt. Cover the pan and cook the beans on a moderate heat till they are tender. Towards the end, mix in the coriander powder. Just before you take the pan off the burner, add the grated coconut and mix well.

When I am using dal, I  soaked it for about an hour or two (I forgot to soak it today so decided to skip it)  then drain it thoroughly. I add it after the curry leaves, and fry it till it turns a very light brown color and acquires quite a soft but still crunchy texture.  After this, it cooks with the beans and is soft enough to eat by the time the beans are done.

This is another tout simple dish to make . And if you don’t count the coconut you could always use less, though along with the chana dal it is really what makes this dish the treat that it is – it has fairly little oil which is a plus too.

Leave a comment

Filed under Easy One Pot Cooking, Everyday Subzis, Salads, Versatile Accompaniments

A Summer Lunch- Couscous Salad with Grilled Trout

One might even call this salad tabbouleh, as many cooks and supermarkets do.

However, I made the mistake a long time ago, of ordering tabbouleh for Indira – when she was very little, about 3, and first started to enjoy store-bought “tabbouleh” – at a Greek/Armenian restaurant called Le Varouj in Grasse.  And found that what we got contained more mint/parsley and lime juice and only a very very little amount of grain. I figured then what the restaurant served us was real tabbouleh, as explained in these two links

http://www.myjewishlearning.com/culture/2/Food/Ashkenazic_Cuisine/Israel/Tabbouleh.shtml

http://www.bbc.co.uk/dna/h2g2/A23428587

while what many of us make, which has a greater proportion of grain such as couscous (some people use bulgur), can be correctly termed only a couscous salad.

Noor, especially, loves it, as do I.

In the summer, it is such a pleasure to make.  Even simpler than pasta to prepare, I love  that there’s no stove-top cooking involved here.

It was made in just 15-20 minutes after I woke up one morning a few days ago and wondered what to pack for Shri’s lunch.

The girls and I had this for our lunch that day with some grilled trout on the side.

tabboulehbalchaocactus 007

Couscous Salad

1 cup of  medium grain, whole wheat couscous

3/4 teaspoon of butter

1 orange bell pepper, diced fine

1 small can of  sweet corn, drained thoroughly ( I have been using the no-added-salt, no-added sugar variety for some time now and the corn tastes so much better without the added salt)

1 medium-sized can of chickpeas, drained thoroughly

2 tomatoes, diced

1-2 tablespoons of chopped, fresh basil

1 cup of finely diced cucumber (unpeeled)

3-4 tablespoons of olive oil

1 and 1/4 cups of just-boiled water

Add the butter to the couscous, then cover it with freshly boiled, salted water and leave it (till all the water is soaked) for 5-7 minutes. Fluff it up gently with a fork.

In a large mixing bowl, combine all the other ingredients, season lightly with salt and black pepper (optional, I skip this), then toss with the olive oil.

Now add the couscous to this bowl, and stir everything together and leave it to rest for about an hour before eating, to allow the couscous time to absorb the juices and flavors of all the vegetables .

This is very fresh, very cool, very light.

Leave a comment

Filed under Easy One Pot Cooking, Picnic Food, Quick Meal Ideas, Salads, Versatile Accompaniments

Grilled Salmon or Trout with Pesto

This is just the nicest way to cook with either of these two varieties of fish.

Grilled Salmon/Trout with Pesto

250 gms of boneless fillet or pave of salmon or trout

some lime juice

salt to taste

approx 1 tablespoon of pesto

Sprinkle salt and squeeze the juice from at least 1/2 a  lime over the fillets. Keep aside for a few minutes while you heat the grill to 200degreesC.

Spread the pesto evenly over the fillets, then grill them at the top of the oven till the fish tests done – the pesto will start to char a little by this point and the fish will flake quite easily.

Serve this hot. Yum !

Leave a comment

Filed under Baked Main Meal Dishes, Quick Meal Ideas, RECIPES, Starters and Snacks, Versatile Accompaniments

Moong Sprouts Chaat

Our lunch today started as a little holiday experiment.

The girls have done some planting in school on more than one occasion, but it isn’t something I have done with them at home.

But there is this book Indira has which she likes to read with me, called “Flowers and Trees” which discusses things like “Do plants eat?”, “Why do we pull out weeds?” , the basics of pollination and so on. So one night a few days ago while we  were reading that book again I suggested that we could try and sprout mung beans, to see how things grow.

The girls literally jumped at the idea, since this offered an opportunity to get out of bed and delay lights-off time.

So we soaked 1 cup of whole, green moong that night in a lot of water. The next morning I drained the water, put the beans in a large, thin tea towel, tied it up in to a bundle, and put it inside the oven, since the idea, I thought, is to keep the beans in a dark place.

[The process I followed this time is the one I remember my father-in-law used to sprout moong once when I was visiting. But then I came across this site today-http://www.sproutpeople.com/grow/sprouting.html – which recommends that seeds need to be allowed to breathe; so I am going to try making sprouts again by leaving the beans in an open but cool area. Another site I also found today which offers a simple guide to sprouting is http://www.wisebread.com/scrumptious-sprouting-for-your-meals ]

It was Monday night when we soaked the beans. And today, Thursday, is  when we finally had chaat, for lunch, that we made with the sprouted beans, using the recipe I got on the phone this morning from my mother. The girls have quite enjoyed opening the bundle every night these past 3 days, to check if the beans were sprouting as expected, helping me sprinkle water on the cloth and then retying the bundle before putting it back in to the oven.

The chaat itself has been a reasonable success. Noor says she likes it; Indira says she loves it.  But I suspect that might be more because she feels this is their project, so to say. She hung around with me in the kitchen this morning, watching with great interest while I prepared the other ingredients for the chaat, and kept a keen eye on things in general (she pointed out that the beans might start sticking to the bottom of the pan soon, when she saw me forgetting to stir them as they cooked because I was talking to a friend on the phone at the same time).

Either way, I am glad they have taken to something that is so nutritious and low-fat.

bhurjiandchaat-011

Moong Sprouts Chaat

Sprouted beans (grown with 1 cup of dry mung beans)

2 medium sized potatoes, boiled, peeled and diced in to small pieces

a 3 or 4 inch long chunk of cucumber, peeled and chopped fine

2 firm, small tomatoes, diced in to small pieces

1 large onion or 2 small onions, peeled and chopped fine

salt, chaat masala powder, red chilli powder (I use the Kashmiri kind, in deference to the girls’ taste buds) and lime juice to taste

2 green chillies (optional), chopped fine

2 tbsp of sunflower oil

1 tsp of cumin seeds

1 tsp of grated ginger

some green coriander, chopped fine

In a frying pan, heat the oil and fry the jeera seeds for a few seconds till their aroma is released. Add the ginger and saute for a few seconds. Then put the beans in and fry them in the oil for  for a few minutes without covering the pan. Then add some  water (about 1 cup or a little more ), cover the pan and cook the beans on low heat till they are quite soft ( they could be cooked in a pressure-cooker too, using a lot less water).

In a large mixing or salad bowl, combine the rest of the ingredients, then add the cooked beans after they have cooled and toss everything together well.

This was a great change from the usual salad/pasta/parantha-subzi kind of lunch. The girls really enjoyed it with plain yoghurt and some buttered toast on the side. I guess one could use the chaat to make a kind of roll or wrap, with phulkas or tortillas, too.

I believe there are endless variations to this basic chaat theme ; one could mix different chutneys, yoghurt, and add other ingredients and spices to the sprouts,  and the sprouts themselves could be of any of a variety of beans.

And I seem to remember a delicious  dahi-puri I have eaten in restaurants in Mumbai which involves filling a mung sprouts-based mix in to golgappas.

I am looking forward to trying my hand at that one in particular !

Leave a comment

Filed under Breakfast Ideas, Picnic Food, Quick Meal Ideas, Salads, Starters and Snacks, Versatile Accompaniments

Tomato,Mozzarella(or avocado), and Pesto Sandwich

There is a wonderful Mediterranean salad, which brings together tomatoes, mozzarella, and either fresh basil or pesto. The result is an incredibly fresh and flavorful dish.

Sandwiches and paninis that combine these ingredients are common in boulangeries here, and I often make variations of that theme.

This is the sandwich that Shri feels he could eat every day for lunch.  Noor loves it too, and I make a much smaller version of it for her sometimes.

Indira doesn’t like the taste of mozzarella – unless it comes to her all melted on top of a pizza or inside the Aubergine Parmigianna in which case she loves it – so she likes me to skip that bit when I make this sandwich for her, though she loves avocado in it.  But I think the combination of mozzarella and pesto is what makes it so special for the rest of us.

pestosalmonandsandwich-015

Tomato,Mozzarella, and Pesto Sandwich

Half of a multi-grain baguette , or olive bread

1/2 of a medium sized tomato, cut in to thin slices

1/4 or 1/8 of an avocado (optional), thinly sliced

50 gms of mozzarella(drained weight), cut in to thin slices

some salad leaves

2 tsp of pesto

Slit the baguette along the length on one side, without cutting through the other side.  Sprinkle a tiny amount of olive oil on both surfaces.

Layer the leaves over the lower half, then follow that with the tomato slices, the cheese slices and the avocado slices. Spread the pesto next, then close the sandwich and wrap tightly in cling film.

Ideally, make this an hour before eating, and all the flavors will come together beautifully.

One could season the filling with some salt, but I tend to think that there are so many lovely flavors here, one would surely not miss the salt; so I skip it.

This sandwich is especially nice if made with olive bread.

Leave a comment

Filed under Picnic Food, Quick Meal Ideas, Starters and Snacks, Versatile Accompaniments

Dhokla – A very quick recipe

I have never been able to make good idlis, and so  had never tried to make dhokla either, since typically that would use the same technique of steaming, which I never had much success with.

Until, that is, my friend Pooja gave me this recipe a couple of weeks ago for making dhokla in the microwave. The preparation time is only about 5 minutes, and the cooking time is only about that as well.

The results were good enough that I have made dhokla more than once since and the girls have really taken to it which is great.

Dhokla

Besan (chickpea flour) 1 cup ( or a mixture of besan and suji i.e. semolina in equal or varying proportions)

125 ml of whisked yogurt

some (about 1/4 cup) water

3/4 tsp of grated ginger

1/2 tsp of turmeric powder

2  tbsp of sunflower oil

lemon juice – 1 tbsp

Eno fruit salt – 1 tsp

salt to taste

1/2 tsp of mustard seeds and 4-5 curry leaves (chopped) for tempering

1  tbsp grated (fresh or desiccated) coconut and 2 tsp of chopped green coriander for garnish

Mix the yogurt, the water, the salt, the ginger , the oil and the turmeric powder in to the besan till the batter has a smooth consistency that is easy to pour(but not too runny). Stir in the fruit salt at the end, and pour the mixture immediately in to a microwave bowl after oiling its sides lightly.

Cover the bowl with an airtight lid and cook the mixture for about 4-5 minutes (at about an 800 W setting).  Check, by inserting a knife in the middle if the dhokla is done else cook for another minute. Leave the bowl in the microwave for half a minute before taking it out.

In a small pan, heat a tbsp of oil, then add the mustard seeds and the curry leaves and fry till the mustard seeds crackle. Pour this mixture over the dhokla, spread the coconut and coriander evenly,  then cut the dhokla after a few minutes in to pieces as big or small as you like.

With some coriander chutney, this is just a delicious treat.

Thank you, Pooja !!


Leave a comment

Filed under Breakfast Ideas, Easy One Pot Cooking, Picnic Food, Quick Meal Ideas, Starters and Snacks, Versatile Accompaniments

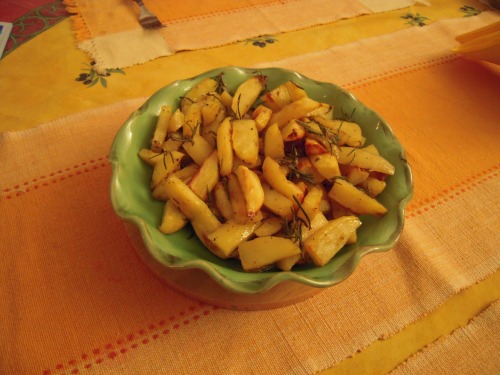
Rosemary-scented Baked Potatoes

This one is worth making just for the heavenly aroma of rosemary that permeates the air as the potatoes bake.

And the potatoes are really delicious too, so the sight of the serving bowl was greeted with rapturous welcome when I made them a few days ago after a long gap of some months.

Indira likes them so much she was moved to say she wished that the rest of us didn’t like them, because that way she could have them all !!

dscn0180

Baked Potatoes with Rosemary

6 large potatoes

3-4 tbsp of olive oil

2 cloves of garlic, crushed or grated

sea salt to taste

freshly ground black pepper, about 1/2 a tsp (add less or more, as you like)

2 tbsps worth of fresh rosemary leaves (these should ideally be chopped, I guess, but I just take the leaves off the stems, rinse them and use them as is)

Peel the potatoes and cut them in to 5mm thick wedges. Set the oven to heat now, at 200degreesC.

Put the potatoes in a mixing bowl, add the salt, and leave for 5 minutes.

Now add the rest of the ingredients, mix well and spread in a single layer on a baking tray. Place the tray at the top of the oven and leave the potatoes to cook for 45-50 minutes.

And enjoy the aroma of rosemary that will begin to fill the kitchen soon 🙂

Half way through, turn over each wedge with a pair of tongs, to cook evenly.

These potatoes work very well as a snack or a starter, or on the side with a soup or a salad. And I am always secretly hoping for some to be left over – though this rarely happens – so that I can put them in to a piece of baguette or some other bread the next day, with some salad leaves and cheese, for a sandwich lunch.

Leave a comment

Filed under Starters and Snacks, Versatile Accompaniments

“Fantastico” Chicken Tikkas

That is how Indira described the taste of the chicken tikkas we had for lunch today.

Ever since I started to try my hand at different tikka recipes some weeks ago, I have been very glad to see that the girls  really love to eat chicken cooked in this form.

Even so  I was surprised by their protests when, in response to Indira’s question last week asking me  if I was going to buy chicken and what kind, as I was leaving for the supermarket for my weekly food shopping last week, I said yes but that maybe this time I’d bring cuts suited to a curry, for a change. Chicken curry and rice has always been such a favored meal for them that I was surprised to see they wanted to eat tikkas yet another time, though it is has been ages since I made chicken curry of any kind.

Well, I must say I am happy to indulge this current preference , since making tikkas is so much easier and quicker than cooking a typical curry.

This is the recipe for the ones I made for lunch today. Noor liked them so much she wanted me to keep the leftover portion for this evening’s gouter, but I told her that might be too early for her stomach for another round of chicken. So they are both looking forward to dinner now 🙂

Chicken Tikkas

300 gms of boneless chicken, cut in to 1 inch pieces

75 ml of yoghurt

1/2 a small onion, grated

1 tsp of ginger paste, or grated ginger

2 small pods of garlic, grated

1/2 tsp of red chilli powder (or a little more, if you like)

3/4 tsp of coriander powder

salt to taste

sunflower oil or butter to baste

Whisk the yoghurt and mix in the onion, the ginger and garlic, the two spices, and the salt. Turn the chicken pieces in this marinade so that they are covered thoroughly in it, then leave in the refrigerator for about 12-24 hours.

Take the chicken out and leave it at room temperature for 10 minutes before grilling.

Pre-heat the grill, for 7-8 minutes, to 24odegreesC . In the meanwhile, take the chicken pieces out, shaking off any excess marinade and put them on skewers, leaving a little space between the pieces. Grill at the top of the oven till well cooked, turning over each skewer at least once and basting all the pieces with a little oil/butter when you turn the skewers.

Squeeze lime juice on to the tikkas before eating.  Sliced onions go well with them too, if you have a taste for these.

These simple tikkas are pretty versatile – they are great finger food and so make an excellent starter; they can be used as fillers for a roti wrap, tossed with a little lime juice flavored salad;  or one could serve them with a salad as a first course.

Leave a comment

Filed under Starters and Snacks, Versatile Accompaniments

Honey and Nutmeg-flavored Chicken Tikkas

I have been thinking for a while that I would like to extend the repertoire of starters I am able to cook, especially of the non-vegetarian kind. I have made the same mangoris, tikkis, and vadas too often now.

I also would love to introduce the girls, gradually, to other kinds of chicken and lamb-based preparations in Indian cuisine that are not the usual curries. At a restaurant in Mumbai some months ago, I noticed that the girls really enjoyed eating reshmi kebabs, and it has been on my mind since then that I should try and make those at home for them, for a change from the usual fare.

So I decided recently to start trying out the recipes in an interesting little book I have had for years in my kitchen, called “Tikkas and Kebabs”, a compilation of recipes by various chefs at prominent restaurants in India.

The one that I tried this evening caught my eye because of the unusual- to me – ingredients that it uses(honey and nutmeg) and because it looked so easy. The tikkas I made with this recipe turned out really well, and both Indira and I loved them. Noor didn’t seem too keen on the taste though; I guess that was down to the unusual/unaccustomed flavor of nutmeg (she said the chicken had a “funny” smell” !!) though that is precisely what I loved about these tikkas.

I think these would be very nice as a first course, served over a layer of salad leaves (and maybe some grated carrot, or as a starter.

Best of all, this recipe really is amazingly simple. An added bonus is that it needs very little oil.

Honey and Nutmeg-flavored Chicken Tikkas

Chicken breasts(de-boned)/chicken fillets  500gms

Lime juice 4 tbsps

Honey 3-4 tbsps

1/2 tbsp of red chilly powder (I don’t like my food “hot” so I used kashmiri chilli powder; you could use a stronger kind)

Garlic paste  1/2 tsp

pepper powder 1/4 tsp

Nutmeg powder 1/4 tsp

a pinch of red food color (I’d say this is optional- the original recipe lists this but I never use any food color)

salt to taste

Mustard or any other cooking oil to baste 1 to 2 tbsps

Cut the chicken in to 2 inch pieces, and pierce these lightly with a fork. Mix all the other ingredients to prepare a marinade. Toss the chicken pieces in it thoroughly and leave in the refrigerator for 5-6 hours. Then put the pieces on skewers, or line the grill with cooking paper and lay them flat on this, and grill at the top of the oven at 200 degrees C till the pieces are well done.

During the cooking process, baste the chicken with mustard oil (I used sunflower oil since I have no mustard oil at the moment) on each side once.

Do try this one; the honey and lime is a delicious combination with the chicken, and nutmeg adds a superb flavor.

2 Comments

Filed under Starters and Snacks, Versatile Accompaniments

Potato and Feta cheese cakes

I made soup for dinner two days ago and fortunately there is enough left for another meal for the four of us. So tonight, I am going to make only these potato and feta patties/cakes, to go with the soup. We’ll pick up some nice walnut bread from the boulangerie when we walk back from school, and that will round off the meal nicely.

The good thing about this recipe is that the mixture keeps well for at least a day, in the fridge, so if there is some left over, I can make a few patties for the girls’ gouter for tomorrow evening.

Potato and Feta cheese cakes

500 gms potatoes

100 gms feta cheese, drained

1 egg, lightly mixed in a small bowl to combine the white portion and the yolk

2 tsp of thyme ( I use the bottled kind)

1 tbsp of lime juice

2 small onions, chopped very fine

salt and black pepper to taste

all-purpose flour

sunflower oil (enough to shallow-fry the patties)

Cook the potatoes in the microwave( I prefer to do it this way rather than pressure cooking because the latter method leaves the potatoes with some water inside, making the final mix prone to sogginess)  till they are soft.

When they have cooled, peel and then mash them in a large mixing bowl. Now mix in the feta cheese (well-crumbled), the onions, the egg, the salt, the pepper, the thyme, and the lime juice.

Mix everything thoroughly, cover the bowl with cling film, and leave it in the fridge for an hour or two.

To make the patties, divide the mixture in to equal sized balls, flatten them between your palms in to 1cm high discs. Coat each lightly in all-purpose flour , then fry them in moderately hot oil in a skillet/shallow frying pan till they are nicely browned and crisp on both sides.

These patties need gentle handling because the cheese makes them quite soft and therefore prone to crumbling.

The original recipe, which I found in a cookbook for vegetarian food from different parts of the world (it is written in French and that has been great for expanding my vocabulary of French culinary terms), calls for fresh thyme and spring onions. But since I never seem to have those two ingredients at hand, I invariably end up using bottled thyme and regular onions, and the patties taste great anyway. The girls just adore them – they don’t seem to care that they contain feta, a cheese that they wouldn’t go near in it’s original form!

Leave a comment

Filed under Picnic Food, Starters and Snacks, Versatile Accompaniments

Summer Special – Roasted Bell Peppers in Olive Oil

Now that summer is here, and those gorgeous orange and yellow bell peppers are available in abundance and at decent prices, I am enjoying one of my favorite summer dishes – roasted bell peppers soaked in olive oil.

Cooked like this, these peppers keep for up to two weeks in the fridge. And they are really versatile – they make a delicious and pretty addition to a summer picnic, or buffet; you can add them to a pasta salad; or use them inside some nice olive or walnut bread, or even just plain baguette, in combination with salad leaves for a really delicious, light sandwich.

They are wonderfully easy and quick to make, too.

Roasted Bell Peppers in Olive Oil

(there’ll be enough here to serve as a starter for 6-8 people)

3-4 bell peppers (red, orange and yellow)

6-8 tablespoons of olive oil

1 clove of garlic

Wash and dry the peppers, then cut each in to quarters lengthwise. Remove the core from each piece.

Pre-heat the oven, at 220°C, for 5 minutes. Line the baking tray of your oven with aluminum foil or cooking paper and place the quartered peppers on it with the skin side up. Roast the peppers for about 15-20 minutes, or till most of the skin of each piece blisters. In the meanwhile, grate the garlic in to the oil.

Let the pieces cool on the tray and then peel off the skin. Slice each quarter in to half lengthwise, place all the pieces in a wide plate, and pour the olive oil on them. Cover the plate with cling film, and leave the peppers in the fridge if you are not going to use them the same day.

If you are, then do finish preparing the dish at least a couple of hours before the meal, so that all the flavors get time to mingle.

You could skip adding the garlic to the olive oil, if you don’t like that flavor.

Enjoy, and thank the Italians for this simple but fabulous taste 🙂

Leave a comment

Filed under Picnic Food, Starters and Snacks, Versatile Accompaniments

Noor’s Favorite Tilwale Aloo

Having just documented one of Indira’s favored foods, I feel this urge to be fair and record one of my younger baccha Noor’s favorites too, before I log off for the day.

Actually, we owe their Nanda Mami a big thank you for introducing us to this amazingly simple, but delicious food when she stayed with us for a few days 3 years ago.

It is very versatile, too.  I make this for us to eat with leftover-daal paranthas and raita, or sometimes as part of a first course, to go with a very french salad, when dinner is a more formal affair with guests at home.

And since I am always looking for ways to up the nutrition quotient- the til (sesame) delivers in that department.

A real winner in every way, then !

Tilwale Aloo

500 gms of baby potatoes

2-3 tbsp of sesame seeds

(I tend to add more as I love the crunchy taste)

1/2 tsp of mustard seeds

1/2 tsp of cumin seeds

1/4 -1/3 tsp of turmeric powder

salt to taste

Juice of half a lemon

3 tbsp of sunflower oil

Boil and peel the potatoes. You can try and save time by by trying to find the pre-boiled,peeled baby potatoes available in some places.

In a frying pan, heat the oil (don’t wait till it starts to smoke, though) and add the mustard seeds. When they start to splutter, add the cumin seeds and as soon as these turns a darker brown (which releases their aroma) add the sesame seeds. Do take care not to let the cumin go black – IMO this neither looks nor tastes good .

Stir the sesame seeds periodically till they start to go a light brown, then add the turmeric, the potatoes, the salt, and toss everything together once. Remember not to let the sesame go too brown. This can make the taste almost bitter. Continue to turn the potatoes from time to time, over the next 5-7 minutes. Now add the lemon juice and cook the potatoes in this juice for another 5-7 minutes, till they liquid is all absorbed.

Take off the heat, and toss in some fresh, chopped coriander if you like.

This dish tastes best if it is prepared a couple of hours ahead of the meal, because this allows time for the ptatoes to really absorb the flavors.

Another thing – I find it works better to have squeezed the juice from the lemon into a bowl befor you start, ready to be used, rather than squeezing the lemon directly over the cooking pan. This latter way, there’s a risk of the seeds of the lemon falling in to the potatoes and then ending up in your mouth. Not good…

For  a  “hot” flavor, you could add some chopped green chillies (to taste) along with the mustard and cumin.

Anyway you make it, this dish tastes great !

Leave a comment

Filed under Easy One Pot Cooking, Everyday Subzis, Picnic Food, Salads, Starters and Snacks, Versatile Accompaniments