Category Archives: Easy One Pot Cooking

Jenny’s Spinach Pie

I ate this once last summer at Jenny’s and it was really quite nice.

So earlier today evening, when I happened to be in her kitchen as she made it for guests that she will have at lunch tomorrow, I noted down the quantities of the ingredients as she cooked.

It looked quite simple to put together, so I am going to try and make it some time soon.

Spinach Pie

2 rolls of store-bought pie crust

a kilo of frozen,very very finely chopped spinach

3-4 tablespoons of creme fraiche

a 210 gm bag of Gruyere cheese

salt and pepper to taste

1 large onion, chopped fine

1 egg, lightly whisked

De-frost the spinach and squeeze out all the water.

In a pan, heat a little oil and fry the onion for a while.

In a mixing bowl, combine the spinach, the onion, the seasoning, the cheese and the creme fraiche.

Place one of the pie crusts at the bottom of a pie dish. Fill with the spinach mixture and spread it evenly. Cover with the second pie crust.

Brush the top with the egg and bake at 175degreesC till done.

Leave a comment

Filed under Baked Main Meal Dishes, Easy One Pot Cooking, Quick Meal Ideas, Versatile Accompaniments

Italian Rice Salad with Tuna, Vegetables and Cheese

At the buffet served after the OIB graduation ceremony held at the CIV tonight – I was there to help with the aperitif and the buffet – there was a delicious rice salad which was contributed by the mum of a student in the Italian section.

Here’s the recipe, as I remember it, which she told me as we served the crowd so I hope I’ve got the details right !

Italian Rice Salad

Cooked and cooled rice (from a region in Italy, if I understood her right, near the one that arborio rice come from) tossed with canned tuna (with the oil), olives, capers, very finely sliced raw carrots(or they may have been very lightly steamed), tomatoes (optional) and small pieces of provolone cheese. Though I forgot to ask if she had used any herbs, I don’t think there was any  seasoning in the salad other than salt.

I am going to try this soon as it would make such a simple, fresh and delicious summer meal though I’ll have to figure out first what the rice variety she’d used might be.  I wonder if it is Carnaroli?  The name she used sounded sort of like that from what I remember and when I google Arborio, I find many references to the Carnaroli rice variety as a great base for risottos and salads – indeed for the former it appears to be a better choice than Arborio.

Leave a comment

Filed under Easy One Pot Cooking, Picnic Food, Quick Meal Ideas, Rice-Pulavs,Biryanis,Baaths, Salads

Tomato Chutney-a Desi -and nicer-Ketchup

The boulanger never wants a chutney/sauce to accompany the vadas, tikkis etc. that I make for his customers.  He doesn’t seem to think it is necessary and this is difficult for me to understand, used as I am to eating any finger food with a dip of some kind.

So yesterday, since he was to going to sell summer-inspired platters of salads and finger foods – he asked for both the khamang kakdi and the carrot salad with chicken tikkas, shami kebabs and batata vadas– I decided to give him some complimentary tomato chutney to serve on the side, for him to test the concept again.

This chutney is another bit of nostalgia from my childhood. In the summer months, dinner was often just this chutney and vegetable pulav with yogurt.

I love the flavor that comes from the use of paanchphoran here and of course that it is so easy to make is another plus.

As I made it yesterday, I thought this chutney would be so much nicer to have, with Indian starters such as pakoras and tikkis, than ketchup.

Tomato Chutney

3 large, ripe tomatoes

1 tablespoon of oil

1/4 teaspoon each of mustard seeds, nigella seeds, fennel seeds, cumin seeds and fenugreek seeds

salt and brown sugar to taste

Wash and chop the tomatoes very fine.

In a frying pan, heat the oil, then add the mustard seeds and the nigella seeds. When the mustard seeds start to pop, add the fennel seeds and the cumin seeds. When these start to brown, add the fenugreek seeds, fry for just a couple of seconds and put in the tomatoes.  Add salt and cook the tomatoes till they are completely soft. Add some sugar  (the chutney should be tangy, not too sweet), cook for another minute, then add water and simmer for a few minutes till the water is well-blended and the chutney is a little thick.

This chutney is a great accompaniment with puri and jeera-aloo, too.

Leave a comment

Filed under Dips,Chutneys,Sauces,Spreads, Easy One Pot Cooking, Versatile Accompaniments

Chicken Pulav(2)

This recipe is quite similar to the other one I’ve used a couple of times to make chicken pulav for the boulangerie. The chief difference is that this one requires tomatoes, while that other recipe calls for lemon juice.

I did without an ingredient that the original recipe – which is from Chef Sanjeev Kapoor’s “Khazana of Indian Recipes” – requires  and that’s chicken stock.

I suspect that would add a great deal to the taste but never having got the hang of how to make stock, I made this pulav yesterday with water instead.  Fortunately it passed muster with both Patrick the boulanger – I will be making this for him next Tuesday – and Maria, our guest last night at dinner.

Maria’s daughter was away this week on the same school trip as Indira and since her husband is traveling on work, we asked her to eat with us yesterday.

Dinner was this chicken pulav, rasedar aloo tamatar, salad with mesclun, red bell pepper,corn and asparagus and multi-cereal baguette. I planned the meal this way because I wanted to suggest the first two dishes to Patrick for next week, along with some carrot salad. Luckily he liked both and Maria appeared to enjoy her dinner too so that turned out okay !

Here’s my adaptation –

Chicken Pulav

2 cups of Basmati rice

500 gms of boneless chicken, cut in to small chunks

3 teaspoons each of ginger and garlic paste

1/2 a teaspoon of Kashmiri chili powder


Leave a comment

Filed under Easy One Pot Cooking, Picnic Food, Rice-Pulavs,Biryanis,Baaths

Thakkali Sadam or Tomato Fried Rice

This rice preparation – native to the south of India – would make a nice meal on a summer day, with a raita on the side and perhaps a light vegetable dish such as cauliflower with paanchphoran or beans poriyal or jeera aloo.

I have adapted the recipe from “Samayal”, a cookbook by Viji Vardarajan. To make it interesting for the customers of the local boulangerie – where they served this today with mint- and coriander-flavored chicken, pumpkin raita and salad greens- I skipped the green chillies in the original recipe and added cashew nuts on a whim.

Thakkali Sadam

1 and a 1/2 cups of Basmati rice

2 large tomatoes, chopped fine

1 small onion, chopped fine

3 tablespoons of oil plus 1 teaspoon to add to the water in which the rice will be cooked.

1/4 of a teaspoon of mustard seeds

1/4 of a teaspoon of cumin seeds

1/2 a teaspoon of turmeric powder

a few curry leaves

50-60 grams of cashew nuts, halved and then fried lightly for a minute or so in a teaspoon of oil

Wash and soak the rice in cold water for 30 minutes , then drain the water and cook the rice with 1/2 a teaspoon of salt and 1 teaspoon of oil in 2 and a quarter cups of water.

When the rice has cooled a little, separate the grains a little with a fork.

Heat the oil in a large frying pan and add the mustard seeds. When these start to pop, add the curry leaves, fry for a couple of seconds and add the cumin seeds. As soon as they start to darken in color, add the onions and fry fora few minutes till they begin to look translucent. Now add the tomatoes, cover the pan and cook till the tomatoes are quite soft and their juice has almost dried up.

Add the turmeric, fry the mixture for another minute, then add the rice and toss everything together. Cover the pan and cook the rice for 6-7 minutes, turning over the rice a couple of times till all of it acquires a uniform yellow color. Just before taking the pan off the heat, mix in the cashew nuts.

Leave a comment

Filed under Easy One Pot Cooking, Quick Meal Ideas, Rice-Pulavs,Biryanis,Baaths

Cabbage Poriyal

We had this for dinner last night, with khichdi.

This dish is so easy to make but it has simple, delicious flavors.

My recipe for this dish is an adaptation of the classical version, since I make it from the faint memory I have from a long-ago time in Nagpur, when I saw a Tamilian friend’s wife cook it.

Cabbage Poriyal

3/4 of a small cabbage, shredded very fine

3- 4 tablespoons of yellow split peas(chana daal), soaked in cold water for 3-4 hours then drained completely

6-7 curry leaves

1 large dry red chilli, split in half

1/2 a teaspoon of mustard seeds

2-4 tablespoons of sunflower oil

salt to taste

1/3 spoon of turmeric powder (less is more, in this case)

1/2  a teaspoon of coriander powder

2 tablespoons of fresh, grated coconut (optional)

Leave a comment

Filed under Easy One Pot Cooking, Everyday Subzis

Fish Fillets in Coconut-flavored Sauce aka Fish Malai Curry

Inspired by the decent results from the trial run of the Prawn Malai curry – I made a very small portion to take to the boulangerie for Patrick to taste and he liked it a lot – and prompted by Indira who was very curious to know what sort of curry I am going to make for this Tuesday’s order from the boulangerie, I decided to make the same curry with white fish fillets and the result is very nice too.

The fish that I used is called cabillaud in French and that’s haddock/hake/cod in English, I think.

We had this tonight with a peas pulav and a small, very fresh-tasting salad of red bell pepper slices and mesclun (the Provencal term for a mixture of young salad greens) tossed in an olive oil, lime juice and basil flakes dressing.

The girls said they liked their dinner very much so I am glad I gave this a try.

Fish Malai Curry

300 gms of fish fillets, cut in to 2 or 3 inch pieces

2 small onions, chopped really fine

4-5 tablespoons of tomato puree

2 teaspoons each of ginger and garlic paste

a couple of bay leaves

1/4 teaspoon of garam masala powder

3/4 teaspoon of turmeric powder

1/2 a teaspoon of Kashmiri chilli powder

1 green chilli, slit in half (optional)

salt to taste

3 tablespoons of oil

50-75 ml of packaged coconut milk (vary to taste – I like the coconut flavor to not be too strong)

Cut the fillets into 2 or 3 inch pieces.

Mix the salt and turmeric in a large bowl and turn the pieces of fish in this mixture gently, to coat them well.

In a frying pan, heat the oil, add the bay leaves, fry for a minute, then add the green chilli and the onions and fry till they are a golden color. Now add the ginger and garlic pastes and fry everything for a few minutes till th onions start to turn a golden brown- but without letting the onions burn or brown too much as this will affect the final color of the curry.

Add the tomato puree next and once the oil starts to appear on the sides, add the turmeric powder and the red chilli powder and fry everything for a minute. Now add the fish pieces, turn over gently a couple of times to coat them well with the onion-tomato mixture, then pour in the coconut milk and water. Simmer the curry for about 10 minutes or till it has the right consistency (not thin and runny, but it shouldn’t be too thick either).

Stir in the garam masala and garnish with fresh, chopped coriander leaves.

Leave a comment

Filed under Curries, Easy One Pot Cooking, Quick Meal Ideas

Simple Scrambled Eggs

This is such a simple recipe that maybe it doesn’t need to be written down, but Noor asked me when I cooked eggs this way for dinner one day last week, to go with a vegetable soup, whether I’ll teach her when she is older how to make this dish.

So I figure she likes this a lot, so it may be worth writing about here too.

Scrambled Eggs

6 eggs

3 tablespoons of milk

a teaspoon of butter (or a little more)

a tablespoon of freshly grated Parmesan cheese (optional)

salt and pepper to taste

Crack the eggs in to a bowl, season with salt and mix the yolks and whites till they are quite well blended with a spoon or fork.

Heat a pan, add the butter and when it  melts spread it all over the base of the pan with a cooking spoon, then pour the eggs in.  Cook the eggs on a low-to-medium heat, stirring very frequently (scrape at the bottom of the pan as well, to lift up the mixture since it will tend to stick) so that the folds that form are small. Take the pan off the heat while the egg mixture still looks a little wet i.e while the eggs are still not completely cooked. The pan will be hot for a little longer and this will finish the cooking process and allow the scrambled eggs to stay soft and creamy when they are served;otherwise they can become a little dry.

Just before taking the pan off the heat, add the cheese and fold it in. This is an optional ingredient but adds a very nice touch.

Add freshly ground pepper to each portion when it’s served.

This dish is ideally made just before it is brought to the table.

Leave a comment

Filed under Breakfast Ideas, Easy One Pot Cooking, Quick Meal Ideas

Prawn Malai Curry

When the boulanger asked if I could do a fish curry for next Tuesday, my first reaction was to tell him honestly that I have very little experience cooking fish. But then I remembered that I made this Bengali curry, which combines prawns and coconut milk, once a long time ago and the girls did like it.

He was quite happy with that suggestion when I mentioned it so this is what I am going to make for next Tuesday along with some peas pulav, batata vada, mint-coriander chutney and carrot salad.

The classical chingri (that’s Bengali for prawn) malai curry does not include tomatoes I think, but I prefer to make it with them.

Prawn Malai Curry

10-12 medium-sized prawns (shelled and de-veined; so I like to use the frozen, ready-to-use variety)

1 small onion, chopped really fine

3 tablespoons of tomato puree

1 teaspoon each of ginger and garlic paste

a couple of bay leaves

1/4 teaspoon of garam masala powder

3/4 teaspoon of turmeric powder

1/2 a teaspoon of Kashmiri chilli powder

1 green chilli, slit in to half (optional)

salt to taste

3 tablespoons of oil

50 ml of packaged coconut milk (or a little less would be okay too)

3/4 cup of water

Soak the frozen prawns in some water for a few minutes, then drain the water and pat the prawns dry.

Mix the salt and turmeric in a large bowl and turn the prawns in this mixture gently to coat them well.

In a frying pan, heat the oil and fry the prawns till they are a golden color (don’t fry for too long else the prawns can become a little hard). Take them out and keep them aside.

In the same oil, add the bay leaves, fry for a minute, then add the green chilli and the onions and fry till they are a golden color. Now add the ginger and garlic pastes and fry everything for a couple of minutes, without letting the onions brown as this will affect the final color of the curry.

Add the tomato puree next and once the oil starts to appear on the sides, add the turmeric powder and the red chilli powder and fry everything for a minute. Now add the prawns, stir together everything well, then pour in the coconut milk and water. Simmer the curry for about 10 minutes or till it has the right consistency (not thin and runny, but it shouldn’t be too thick either).

Stir in the garam masala and garnish with fresh, chopped coriander leaves.

This curry is best eaten with plain, hot Basmati rice or a peas pulav, IMO and makes a great change from the more time-consuming chicken or lamb curries. It reminds me of that ad from long ago – I think it was the TV commercial for Maggie noodles when they were first introduced in India – “quick to cook, good to eat!”

Leave a comment

Filed under Curries, Easy One Pot Cooking, Quick Meal Ideas

Chicken Pulav(1)

I wanted to persuade the boulanger to try something other than chicken curry – though that does seem to work well with his clients – for next week’s order.

So since I had some boneless chicken left over in the fridge, I used it to make chicken pulav. The girls liked it a lot and fortunately there is enough that they can have it for dinner tonight.

As for the boulanger, his reaction was so pleasing.  He said, without tasting either the pulav or the upma (which is what I have had made for lunch today so I took some of that too, for him to taste) that he would like me to make both these things for next week; when I asked him to taste both dishes so as  to be sure, he said that wasn’t necessary since “whatever you bring is all delicious “.

Now, I have my fingers crossed that his clients feel the same way next week 🙂

This recipe is adapted from one in Rocky Mohan’s “Art of Indian Cuisine”.

Chicken Pulav

2 cups of basmati rice, washed and soaked in cold water for 30 minutes and drained thereafter

400-500 gms of boneless chicken, cut in to small pieces

3 teaspoons each of ginger and garlic pastes

2 medium sized onions, chopped fine

4-5 cloves

4 pods of green cardamom

3-4 small sticks of cinnamon

2 green chillies, finely chopped

4 tablespoons of sunflower oil (or 3 of oil and 1 of ghee)

To be mixed together:

150 ml of yoghurt

1 teaspoon of turmeric powder

1/2 a teaspoon of red chilli powder

1 tablespoon of coriander powder

1/2 a teaspoon of freshly ground black pepper

the juice of 1 large lime

salt to taste

To make the Pulav:

In a large frying pan, warm the oil and add the green cardamom, cloves and cinnamon. Fry for a few seconds till their aroma begins to be released.

Add the onions and fry till they begin to look translucent.

Now add the pastes and the green chillies (optional; I skipped this) and fry again till everything turns a golden-brown color.

Add the chicken pieces next, turn up the heat a little and fry till they are golden all over.

Add the yogurt mixture, season with salt and mix everything together well. Cover the pan, lower the heat and cook till the chicken is tender and the water in the yogurt dries up, turning the mixture over every once in a while.

Add the rice, mix it in thoroughly, then add 3 and a half cups of hot water. Cover the pan, turn up the heat and bring the water to a boil. Now reduce the heat again to quite a low setting and simmer till the rice is cooked and all the water is absorbed.

Leave the pulav covered for a while before serving it as I feel this allows the flavors to develop further.

This is so quick and easy to make; a great alternative to biryani.


Leave a comment

Filed under Easy One Pot Cooking, Picnic Food, Quick Meal Ideas, Rice-Pulavs,Biryanis,Baaths

Vangi Baath: An unorthodox variation

Traditionally, vangi baath is a pulav/fried rice that has only one vegetable in it and that is the aubergine which gives the dish its’ name.

But when I decided to make it for dinner tonight,along with some khatti-meethi daal, I felt there ought to be a dash of green in our meal.

So I made this rice dish today with aubergines and green beans.

The girls don’t know what the original is like, in any case, and Shri usually gamely goes along with all these variations to the classics!

This recipe is adapted from the one in Viji Varadarajan’s “Samayal”, a book about South Indian vegetarian cuisine.

2 cups of rice, cooked-with a little salt-  beforehand in 3 cups of water (which makes this recipe a great way to use leftover rice)

1 thin and long aubergine, diced

1 medium-sized tomato

1 cup of chopped green beans (optional)

1 large onion, chopped fine

1 green chilly , slit in to half (optional)

1/2 or 3/4 of a teaspoon of turmeric powder

1/2 a tsp of mustard seeds

6-8 curry leaves

1 and a 1/2 tablespoons of pitlai powder

3-4 tablespoons of thick tamarind juice

4 tablespoons of sunflower oil

In a large frying pan, heat the oil, then add the mustard seeds and the curry leaves. After a few seconds, when the seeds crackle, add the green chilly, the onions and sauté till the onions start to look translucent. Add the beans, cover the pan and cook till they start to soften just a little. Now add the aubergine, cover and cook again till the aubergines begin to soften too, turning everything over once in a while.

Now add the tomato and fry for a few minutes till the tomatoes begins to become quite soft.  Add the spices next, fry for a minute or two, then add the tamarind juice and mix it in well.  Season the vegetables with salt, add the rice – separate the grains gently with a fork first – and fry for a few more minutes till everything is thoroughly mixed.

I might try this dish without the tomato – and with peanuts – another time, since I think I remember eating it like that a long time ago.

Tonight, the girls each asked for a second helping of the vangibath with a little ghee, and I tried that too. Yum !

Leave a comment

Filed under Easy One Pot Cooking, Quick Meal Ideas, Rice-Pulavs,Biryanis,Baaths

Sevai Upma

A long time ago, Priti and I shared an apartment in Bhopal for three months, while we worked on a project at the BHEL factory.

One of the many things that made it such a memorable time was the cooking we did together.

It was also where I got my tea habit, but that is another story.

This post is about the delicious sevai (vermicelli) upma that Priti used to make, the taste of which has stayed with me all these years.

So recently I asked her to mail the recipe to me  since I had forgotten both the process and the proportions of the various ingredients.

She sent me a picture too –

Here’s what she told me to do, in her words, with  some variations of my own in parentheses.

1 generous tbsp of oil to roast the vermicelli in
1tsp mustard seeds
2-3 carrots julienned
1 green capsicum  julienned (I used red bell pepper today)
julienned hari mirchi (I had no green chillies so I used half a whole red chilli)
1 sliced onion (optional and so I cooked the upma without)
1 cup measure of  vermicelli (I used a thicker variety since the usual kind was not available the day I went looking for it)
6-7 curry leaves
2 tbsp shelled peanuts (optional and so I cooked the upma without)
lime juice
salt

Steps :
1. Roast the vermicelli in the oil on a thick bottom/non stick pan.  You have to keep stirring the vermicelli otherwise it tends to burn quickly. I like to roast it fairly dark brown but not burnt-it’s a fine line (I agree – I found myself stirring constantly !)
2. Set aside the roasted vermicelli. In the now empty pan, add another 1.5 tsp (I used a little more) of oil , then add mustard seeds and curry leaves. If you are using onion cook them until brown. Then add the vegetables, stir 4-5 times (I covered the pan for a few minutes to cook the vegetables, stirring every once in a while)
3. Add  2 cups of water, salt,the vermicelli and the peanuts .
4. Cook, covered, on low heat. Watch for the water- if it dries out and the vermicelli does not become almost double it’s original size then add some more. Sometimes I just turn off the stove and let it cook in the steam.
5. Add lime juice; the vermicelli tend to unstick once the lime juice is added so you can add the juice, leave the upma covered for a couple of minutes and then transfer to the final serving dish.

Here’s how my version looks, which I have made for lunch today.

Some of the girls’ reactions –

After the first forkful, Indira said “ummm, very nice !”

A few minutes later – “It’s delicious, and I am going to call it pasta upma” (I guess that because the thicker vermicelli I used does it make it look

a bit like spaghetti !)

And Noor says “It’s excellent, this noodles upma“.

Thank you, Priti Aunty, for a very successful lunch.

1 Comment

Filed under Breakfast Ideas, Easy One Pot Cooking, Picnic Food, Quick Meal Ideas, Starters and Snacks

Rava Upma

Like poha, the girls have loved to eat upma since they were babies.

For me, it is a convenient option as it is one of those easy to cook and all-in-one meals – carbs plus vegetables plus some protein from the lentils.

This is what we had for lunch today, with yogurt on the side, clementine juice and then fresh pineapple – which Indira prefers to the canned variety – for dessert.

Though coconut chutney and/or sambhar are the ideal accompaniments for upma, I sometimes eat mine with ketchup – a habit acquired in childhood.  Ma has always made the most delicious upma and it was probably sacrilege to smother its’ flavors in ketchup but back then it was the way Bittu b. and I enjoyed eating it most !

Rava Upma

1 cup of suji/rava/semolina

1 medium-sized onion

2 small carrots

1/4-1/2 cup of frozen green peas (less or more, as you like it)

1 small tomato

1 dry red chilli, broken in two

1/2-3/4 teaspoon of mustard seeds

2 tablespoons (or a little less) of yellow split pea lentils (chana daal)

6-8 curry leaves

2-3 tablespoons of sunflower oil, 1/2 of ghee

Roast the semolina in a warm pan for a few minutes till the grains start to turn a very light brown – at this stage there is a very distinct aroma.

In the meanwhile, in another large frying pan, heat the oil a little and add the mustard seeds. When these begin to crackle, add the curry leaves, the chana daal and the red chilli halves. Roast the daal till it begins to turn a light brown, then add the onions. Cook these for a little longer than when they turn translucent,

2 Comments

Filed under Breakfast Ideas, Easy One Pot Cooking, Quick Meal Ideas, Starters and Snacks, Versatile Accompaniments

Chickpeas Salad aka Chickpeas Sundal

This is one more Indian recipe that is easily passed off as a salad.

I love how the chickpeas work here equally well with a variety of fruits – I sometimes add mango, or peach when it is in season, and tonight I added finely chopped orange segments.

We had this sundal for dinner tonight with tomato-pumpkin-broccoli soup and some nice multi cereal bread from the boulangerie.

Chickpeas Salad or Chickpeas Sundal

1 can of chickpeas, drained well

3-4 tablespoons of freshly grated coconut

1 mandarin orange, peeled and divided in to its’ segments(or 1 peach, peeled and diced fine, or an equivalent amount of diced mango)

1 large sprig of curry leaves

1 teaspoon of freshly grated ginger

1/2 a teaspoon of mustard seeds

salt to taste

Indira thought tonight, at first glance, that the fruit in the salad was pineapple. Which has given me the idea to try it with that fruit the next time.


Leave a comment

Filed under Easy One Pot Cooking, Picnic Food, Quick Meal Ideas, Salads, Starters and Snacks, Versatile Accompaniments

Vegetable Khichdi

This was tonight’s dinner, with yogurt and avocado slices in lieu of salad.

As I said to one of the school mums some time ago, converting the girls’ to avocado – we are not there yet with Shri though- has been one of the big culinary victories of the last year. They love it the way it is enjoyed best IMO –  au nature, or with a dressing of a little lime juice and sometimes dried basil flakes.

So that “salad” helped add interest to the meal tonight because  khichdi is not one of their prefered foods.

Vegetable Khichdi

3/4 cup of rice

2/3 or 3/4 cup of dhuli masoor daal (red lentils)

200 grams of diced pumpkin

5-6 tablespoons of frozen peas

1/2 tespoon of freshly grated ginger

1 medium sized onion, chopped fine

1 medium sized tomato, chopped fine

2 tablespoons of sunflower oil, 1 tablespoon of melted ghee

1/4 teaspoon each of the five paanchphoran spices (a little more of the fennel seeds)

3/4 teaspoon of turmeric powder

1/2 a teaspoon of coriander powder (optional)

1 and a half tablespoons of fresh green coriander leaves, chopped

Wash and soak the rice and daal separately for 2-3 hours.

In a pressure cooker, heat the oil and the ghee and then add the paanchphoran spices in the order suggested here.

Add the onion and fry till it starts to turn a golden color. Now add the pumpkin, and fry both together for a few minutes till the onion starts to turn golden brown and the pumpkin starts to soften and break up.  Now add the ginger, fry for half a minute, then add the tomato and fry the mixture till the oil starts to appear on the sides. Now add the dry spices and the peas and fry for a few minutes. Add the rice and daal after draining them of the water in which they were soaked, season with salt, pour in 4 cups of water, mix everything well  and cook for as long as required for most of the water to be absorbed and for the rice and daal to cook well (with my pressure cooker, this requires about 5-6 whistles).

Once the cooker has cooled enough for the lid to be lifted off easily, stir everything together once and garnish with fresh green coriander if possible.

Add more ghee to individual servings if you like.

Though I absolutely love the much simpler moong daal khichdi which is a staple of Gujarati thalis everywhere, I quite like this one too and it is such a convenient and quick one-pot-cooking type recipe.

Leave a comment

Filed under Easy One Pot Cooking, Quick Meal Ideas, Rice-Pulavs,Biryanis,Baaths

Baked Parsnip Chips

The first time I came across this vegetable was at a Christmas PTA lunch two years ago at the home of one of Indira’s classmates. The hostess provided these chips as one of the starters and I really loved their sweetness and almost herby flavor.

But then I overheard some of the French teachers at the lunch say to the lady jokingly that in France this vegetable is considered good only for horses 🙂 Since then, I have also heard people say it is “pig food”  though in England and some other countries it is in fact a common “people food ” as they eat it steamed/boiled/fried/baked or added to soups.

The very distinctive taste of those chips has stayed with me so when I spotted parsnips (panais in French) for the first time in Carrefour recently, I bought some.

This is what we are having  for dinner tonight, with a vegetable soup and garlic bread.

To see what parsnips look like(imagine a large, cream/beige carrot) check here

Baked Parsnip Chips

Two large parsnips (about 500 grams), peeled and cut in to slices, hard core removed

3 tablespoons of olive oil

salt and pepper to taste

Put the parsnip slices in a large mixing bowl, season lightly with salt and freshly ground black pepper. Add the olive oil and toss everything together well.

Spread the slices on a baking tray in a single layer and bake until done (at least 25 minutes) at the top of the oven, at 200 degrees C.

As it turned out, Indira did not take to these tonight, just as she did not like the sweet potato chips too much. But the rest of us polished off the lot 🙂

The herb-like taste and aroma that I felt I noticed may be because this vegetable apparently belongs to the Umbelliferae family, whose other members include carrots, coriander, parsley, fennel, cumin, dill etc.

2 Comments

Filed under Baked Main Meal Dishes, Easy One Pot Cooking, Quick Meal Ideas, Starters and Snacks, Versatile Accompaniments

Palak ka Saag,Curried Spinach or Palak Masala

The first of those names is what this dish was called in my parents’ home; but since saag is not a term a lot of people seem to know readily, I thought I’d like to call it the other two as well, since the base for this dish does come from the fairly standard onion-tomato-garlic-ginger-dry spices masala which is common to many curries.

I remember the first time Indira exclaimed  “I really like palak !” though both she and Noor have always eaten it without any fuss.

It was the day I had added, as I always saw my mother do, a teaspoon of ghee near the end of the cooking process.  The result is a quite delicious, special taste 🙂

Especially if one uses frozen spinach, this can be a quick and easy subzi to make.


This is what we’ll eat for dinner tonight, with varan, phulkas and some chicken curry for the girls – it is their first day back in school after the holidays so it is very likely they won’t have been pleased with whatever was on offer in the cantine for lunch 🙂

Palak Ka Saag

Well I am back a day later to add the recipe to this post. Before that though, I want to record that  I needn’t have worried about the girls’ school lunch yesterday at all !  It turned out there was steak hache and pasta on the menu so a very good meal was had by all prompting the girls to say

” Mama I missed you but I would not have wanted to come home today fro lunch because then I would have missed the steak !! ”

But they did justice to the chicken curry and spinach anyway, so I guess that’s okay 🙂
On to the “curried spinach” –

4 tablespoons of sunflower oil

400 grams of frozen spinach leaves

2 medium sized onions, chopped fine

2 medium sized tomatoes, chopped fine or 4-5 tablespoons of canned tomatoes pulp

1 or 1 and a 1/2 teaspoons each of ginger paste and garlic paste (or equivalent amounts of freshly grated ginger and garlic)

1/2 teaspoon each of turmeric powder, kashmiri chilli powder, coriander powder, garam masala powder

3 pods of green cardamom, cracked slightly

salt (about 1 and a 1/2 teaspoons, or to taste)

1 teaspoon of melted ghee

Defrost the spinach leaves. When they are at room temperature chop them fine  in a food processor.

In a large frying pan, heat the oil, then add the cardamom pods. When their aroma starts to be released, add the onions and fry till they start to go from a golden brown to a darker brown – but not longer than that. Add the ginger and garlic pastes, fry for a couple of minutes, then add the tomatoes (or pulp). Fry this mixture till the oil starts to appear on the sides. Add all the dry spices next and fry for a minute. Add the spinach now, season with salt, and cook, covered, till the leaves are soft enough. A minute before you take the pan off the fire, add the aforementioned teaspoon of ghee, and mix it in thoroughly for a sublime taste 🙂

Leave a comment

Filed under Easy One Pot Cooking, Everyday Subzis

Carrot and Green Bell Pepper Pulao

One day I will cook a “pilaf”, just to be able to post about it so I get to use the word pilaf, which I love  because it has such an exotic ring about it !

In the meanwhile – this is the recipe for the pulao I wrote about last summer but which I haven’t made since, until this past weekend. I have adapted it from the original recipe which is in Viji Varadrajan’s “Samayal”, a cookbook about the cuisine of the Tanjore and Palghat regions of southern India.

In the summer last year it was Noor who said she loved this pulao. Then on Sunday it was Indira who wanted to know if there’s be enough left over for Monday. I guess that means we can put it in the Favorites Foods column.  Or at least for now, for they may change their minds in some weeks in their sometimes fickle way 🙂

(An update to that from 15 Sep 2010 – Indira said again, when we had this for dinner last night, that she loves this pulav)

The use of the podi is what gives it it’s distinctive, delicious taste.

Carrot and Green Bell Pepper Pulao

Basmati rice – 1 cup

1 large green bell pepper, sliced fine

3 medium sized carrots, peeled and diced in to thin half-moons

1 tablespoon of Pitlai podi

3/4 teaspoon of turmeric powder

lime juice, to taste (but at least 1 tablespoon)

3/4 teaspoon of mustard seeds

8-10 curry leaves

salt, to taste (or say about 1 and a 1/2 teaspoons for the rice and 1/2 a teaspoon to be added while cooking the vegetables)
Wash and soak the rice in cold water for 20-30 minutes, then cook it with a little less than twice the amount of water (I use an electric rice cooker and therefore add 2 and a half cups of water) with salt added in.

Let the rice cool before you start to cook the vegetables so that you are able to separate the grains of rice gently, by hand or with a flat spoon, without breaking the grains.

In a large frying pan, heat the oil, then add the mustard seeds and the curry leaves. When these begin to crackle, add the carrots and fry them on a medium high heat till they are soft enough without being mushy (i.e. they should retain a bite).  A few minutes before you think the carrots will be done, add the bell pepper slices and fry everything together till the latter are cooked (I prefer that these should retain a bite too) as well.

Add the salt, the turmeric powder and Pitlai podi and fry everything for another couple of minutes.

Now add the rice, mix it with the vegetables, then put the lime juice and  toss everything together gently but quite well over 4-5 minutes.

This makes a very nice meal with varan and salad, or just a raita in the summer.


Leave a comment

Filed under Easy One Pot Cooking, Picnic Food, Quick Meal Ideas, Rice-Pulavs,Biryanis,Baaths

Steamed Salmon

This recipe is the same as for steamed trout, but Indira loves salmon cooked this way so much – and she certainly prefers it to the trout – I thought it deserves its own post.

Though Noor informed me a couple of days ago that she still prefers her trout/salmon to be grilled with pesto, so I must remember to make it like that for her next time, instead of steaming the fish yet again 🙂

astoramachipsvihaanaloovadas 037

Steamed Salmon

Salmon fillets

1 tablespoon of fresh rosemary

sea salt to taste

a few slices of lime

Sprinkle the salt on the salmon, spread the rosemary, then place the slices of lime on top.   Fill some water in the bowl of the steamer and set it to heat. Now place the fillets in the basket of the steamer and cook the fish till it is done.

Eat this hot, squeeze some more lime  if you like after breaking up the pieces of fish a little.

Just delicious.

4 Comments

Filed under Easy One Pot Cooking, Quick Meal Ideas, Starters and Snacks, Versatile Accompaniments

Desi scrambled eggs – Egg Bhurji

A desi version of scrambled eggs, this is a really versatile dish.

It makes for an indulgent Sunday breakfast, with toast and butter or even baguette and cheese and I make it for dinner  too sometimes, to go with soup, in the winter.  And the leftover portion is always good for a sandwich filling the next day, with a little ketchup tossed in 🙂  Shri and the girls really enjoy this dish and I am glad about that as it is one of those things that is so easy to make .

astoramachipsvihaanaloovadas 023

With or without the peas or green bell pepper, this is a delicious way to eat eggs.

Leave a comment

Filed under Breakfast Ideas, Easy One Pot Cooking, Picnic Food, Quick Meal Ideas, Versatile Accompaniments

Pretty Pasta Salad !

This is a personal favorite, one that I would love to make more often except I know that the rest of them prefer their pasta with sauce – unless it is au nature, with just some olive oil, which is the way the girls love it.

But they eat this without fuss as well, though with a lot of Parmesan cheese grated on top.

When I made it a few days ago the salad looked so pretty, sitting there so full of color, that I just had to take a picture, much to Indira’s amusement.

pastatroutwheatberries 007

Pasta Salad

There is enough here for 6.

Tricolor pasta, preferably the whole wheat kind – 200 gms (dry weight)

one large orange bell pepper, sliced quite fine

3 tomatoes, diced in to chunks

1 can of sweet corn (drained weight 140 grams)

some salad leaves, any kind (green as well as the ones with some  purple as they add so much color)

salt and dried basil to taste

3-4 tablespoons of olive oil and 2-3 tablespoons of lime juice for the dressing

Cook the pasta till it is done. In the meanwhile, assemble all the other ingredients except the salad leaves, season with salt and basil, pour the olive oil and lime juice evenly all over and toss everything well. When the pasta is done, drain and then cool it a little, before mixing it well with the other ingredients. Now add the salad leaves, and toss the salad a couple of times and leave it to rest for a while so that all the flavors mingle.

I love to eat this dish with a little drizzle of chilli-flavored oil and some freshly grated Parmesan.

This salad is a good picnic meal as well, like the wheat berry salad.

2 Comments

Filed under Easy One Pot Cooking, Picnic Food, Quick Meal Ideas, Salads, Versatile Accompaniments

Steamed Trout

Fish is one of those things I strangely cannot remember having watched my mother cook when I lived at home, though we had fish curry quite often  as both she and my father loved this dish and a friend of my father’s would often bring us delicious fresh water fish from his village that was not far from where we lived in Bokaro. And although Boudi, who is an excellent cook, makes the most delicious fish curries including Bengali cuisine classics such as bhapa maach and doi maach, I somehow never paid attention, when she was in the kitchen making one of those dishes, either. So each time I go back now to Mumbai for a holiday I tell myself that I am going to learn from her to cook one of those dishes. I never seem to get around to it though.

So fish has remained something that I don’t really know much to do with, which is the reason I either toss canned tuna or salmon in to pasta sauce or salads, or grill fresh fish as I learned to do a few years ago.  It is only recently that I have finally started to make a basic fish curry once in a while, and the girls do enjoy it.

And then this last Saturday we ate at the home of Doris and Jean-Luc, the parents of Indira’s childhood friend Celine and Doris made some excellent steamed white fish that Indira really loved. Luckily Doris cooked the fish after we arrived, so I was able to watch the process for myself. It is such a simple way to cook fish,  and so healthy too,  it made me regret that I hadn’t tried it all these years , especially when the girls were babies when it would have been so light and nutritious a meal for them.  Anyway…

So today for lunch I steamed trout, which Indira said, in her droll way, was “deliceuse !”

Noor was very satisfied with her lunch too, but then we had the fish with a salade de ble (made with wheat berries) which she loves, so it might have been that which worked for her.

Here’s my variation on the way Doris cooked the fish :

pastatroutwheatberries 016

Steamed Trout

Trout fillets

1 tablespoons of fresh rosemary

salt to taste

lime juice – enough for a liberal sprinkling over the fish, say 2 tablespoons, or a few slices of lime

Sprinkle first the salt, then the lime juice over the fish fillets(or place the slices of lime on top of the fillets).   Fill some water in the bowl of the steamer and set it to heat. Now spread the rosemary on top, place the fillets in the steamer and cook the fish till it is done.

Eat this hot, squeeze some more lime  if you like after breaking up the pieces of fish a little.

This preserves all the natural taste and sweetness of trout and, once again, a process tout simple.

Leave a comment

Filed under Easy One Pot Cooking, Quick Meal Ideas, Starters and Snacks, Versatile Accompaniments

Potato Salad with Lemon and Chive Vinaigrette

At one point during these summer holidays, I found myself utterly exasperated with cooking the same things again and again. I happened to mentioned this to Jenny and told her that I was in desperate need of recipes that would be quick to cook and suited to the weather in terms of the cooking effort (low) and style (light, non-greasy, not spicy).

At this she was good enough to loan me, among other recipe books, her copy of Delia Smith’s ” Summer Collection”.

That’s where I found the recipe for this salad. When I made it last week  Indira liked enough to say “You should definitely make this again !”

I have made some changes to the original; here is my version.

pics-on-camera 649

Potato Salad

6oo grams of potatoes, cooked in the microwave till they are soft, then peeled and diced (not too small) soon after you take them out

3-4 spring onions, trimmed and chopped small

2 tablespoons of fresh chives, snipped fine with scissors

For the vinaigrette

1 or 2 tablespoons of fresh, chopped mint

3-4 tablespoons of lemon juice

grated zest of one small lemon

3 tablespoons of olive oil

1 teaspoon (or a little more if you like more of this flavor) of grain mustard

1 clove of garlic, grated

rock salt, to taste

freshly milled black pepper, to taste

Combine all the ingredients for the vinaigrette then pour it on to the potatoes while they are still quite warm (the original recipe therefore requires that baby potatoes be used. Cook these with the skin on and add the dressing as soon as the potatoes are done, after draining the cooking water) and mix well.  Add the spring onions and the chives next, and mix the salad again a couple of times.

This is simple and delicious, with lots of subtle flavor.

2 Comments

Filed under Easy One Pot Cooking, Picnic Food, Quick Meal Ideas, Salads, Versatile Accompaniments

Green Beans with Coconut or Beans Poriyal

I once passed off – successfully so – this very Indian subzi as a salad.

Either way, it is really fresh and light and  just great to eat in the summer.  And while it does take some time to dice the beans, the cooking part is so easy that it makes up for the longer prep time.

I love to eat it with sambhar and rice, or with phulkas and yoghurt. Or just mixed in to plain, hot rice, as Indira likes it too.

The recipe here is based on my memory of eating it in the homes of Tamilian friends and of watching one of them cook a similar dish once with very finely sliced cabbage. I believe vegetables cooked in this way are called poriyals.

pics-on-camera 682

Green Beans with Coconut

400 grams of fresh green beans, washed, ends trimmed and diced quite small

1-2 tablespoons of sunflower oil

salt to taste

1 large dry red chili, broken in to two parts (optional though this spice adds a great flavor)

a pinch of asofetida (optional)

1/2 a teaspoon of mustard seeds

5-6 curry leaves

1/2 a teaspoon of coriander powder

2-4 tablespoons of fresh, grated coconut

2 tablespoons of chana (yellow split peas or black gram) dal though this too is optional

In a frying pan, heat the oil to a moderate temperature, then add the asofetida and the mustard seeds and fry till the seeds start to crackle and pop. Add the curry leaves and the red chili and fry for a few seconds. Now add the beans and mix well with the other ingredients. Cook uncovered for 3-4 minutes, turning over the beans a couple of times, then add  1/4 of a cup of water -maybe a little less, maybe a little more, depending on how fresh and soft or tough the beans are – and salt. Cover the pan and cook the beans on a moderate heat till they are tender. Towards the end, mix in the coriander powder. Just before you take the pan off the burner, add the grated coconut and mix well.

When I am using dal, I  soaked it for about an hour or two (I forgot to soak it today so decided to skip it)  then drain it thoroughly. I add it after the curry leaves, and fry it till it turns a very light brown color and acquires quite a soft but still crunchy texture.  After this, it cooks with the beans and is soft enough to eat by the time the beans are done.

This is another tout simple dish to make . And if you don’t count the coconut you could always use less, though along with the chana dal it is really what makes this dish the treat that it is – it has fairly little oil which is a plus too.

Leave a comment

Filed under Easy One Pot Cooking, Everyday Subzis, Salads, Versatile Accompaniments

A Simple Summer Lunch -Carrot & Green Bell Pepper Pulao with Cucumber Raita

Once again today Noor melted my heart with her  “you make very nice food , Mama” statement.

I love it when they seem to enjoy their meal.

Indira expresses the same feeling when she comes sniffing around the kitchen; she is one for showing her appreciation with her nose.

But it is Noor who often tells me “I love all the food you make ” and sometimes “you are the best cooker ever”.  So just for her I’ll come back to put down the recipes for today’s lunch – vegetable pulao ( a south Indian sort with a spice mix called pitlai powder) and cucumber raita.

Indira seemed to think , while she watched me make the raita, that it was one she didn’t like ( I haven’t made it  since last summer, probably)  but the heat has been so bad this week I thought it was what we needed to eat today.

So it was good to see her polish off two katoras of it and a little more…

Leave a comment

Filed under Easy One Pot Cooking, Picnic Food, Quick Meal Ideas, Raitas, RECIPES

A Summer Lunch- Couscous Salad with Grilled Trout

One might even call this salad tabbouleh, as many cooks and supermarkets do.

However, I made the mistake a long time ago, of ordering tabbouleh for Indira – when she was very little, about 3, and first started to enjoy store-bought “tabbouleh” – at a Greek/Armenian restaurant called Le Varouj in Grasse.  And found that what we got contained more mint/parsley and lime juice and only a very very little amount of grain. I figured then what the restaurant served us was real tabbouleh, as explained in these two links

http://www.myjewishlearning.com/culture/2/Food/Ashkenazic_Cuisine/Israel/Tabbouleh.shtml

http://www.bbc.co.uk/dna/h2g2/A23428587

while what many of us make, which has a greater proportion of grain such as couscous (some people use bulgur), can be correctly termed only a couscous salad.

Noor, especially, loves it, as do I.

In the summer, it is such a pleasure to make.  Even simpler than pasta to prepare, I love  that there’s no stove-top cooking involved here.

It was made in just 15-20 minutes after I woke up one morning a few days ago and wondered what to pack for Shri’s lunch.

The girls and I had this for our lunch that day with some grilled trout on the side.

tabboulehbalchaocactus 007

Couscous Salad

1 cup of  medium grain, whole wheat couscous

3/4 teaspoon of butter

1 orange bell pepper, diced fine

1 small can of  sweet corn, drained thoroughly ( I have been using the no-added-salt, no-added sugar variety for some time now and the corn tastes so much better without the added salt)

1 medium-sized can of chickpeas, drained thoroughly

2 tomatoes, diced

1-2 tablespoons of chopped, fresh basil

1 cup of finely diced cucumber (unpeeled)

3-4 tablespoons of olive oil

1 and 1/4 cups of just-boiled water

Add the butter to the couscous, then cover it with freshly boiled, salted water and leave it (till all the water is soaked) for 5-7 minutes. Fluff it up gently with a fork.

In a large mixing bowl, combine all the other ingredients, season lightly with salt and black pepper (optional, I skip this), then toss with the olive oil.

Now add the couscous to this bowl, and stir everything together and leave it to rest for about an hour before eating, to allow the couscous time to absorb the juices and flavors of all the vegetables .

This is very fresh, very cool, very light.

Leave a comment

Filed under Easy One Pot Cooking, Picnic Food, Quick Meal Ideas, Salads, Versatile Accompaniments

Tomato, Ham and Cream Sauce for Pasta – A recipe to mark Mother’s Day 2009

It is Mother’s Day – fete de les meres – in France tomorrow so Shri took us out for dinner today to a  restaurant in Golfe Juan, overlooking the old port and all the boats docked there.

Thank you, Shri, Indira, Noor, for a very nice evening  🙂 The walk back along the port from the restaurant to the car park was wonderful; it was a full moon night and the sea looked really pretty.

The chef at the restaurant was good enough to give me a fairly detailed recipe for the delicious pasta that Noor had.

We all really liked the sauce and it isn’t one I had tasted before. So I decided to go up to the chef -a very young guy- and ask for the recipe.

Here’s what he told me as he took a short pause from putting the finishing touches on a pizza he was about to put in to the oven;  I’ll refine the quantities when I make this sauce myself.

He said “make the usual kind of tomato sauce – some onions softened in olive oil with a bit of laurier, then add some meat (it was little cubes/chunks of ham in the version we had today), cook everything for a little while, then add just a little bit of white wine(he moved his hand in this quick motion which made me imagine him pouring out a tablespoon or 2 from a bottle), let it evaporate, then add tomatoes, and let it all cook for some time (he said an hour but I guess that would depend on the quantity of tomatoes). Finally add a little cream and simmer the sauce for a couple of minutes”.

This should taste good with chicken as well, or diced aubergine for a vegetarian version.

The other interesting thing that happened was that Indira- I think inspired by the neat arrangement of rice, vegetables and salmon on my plate –  told us that one of things she might also want to do in university – apart from studying dance (we talked recently about the concept of university and how being a professional of any sort typically requires some years of study in university) – is to learn to be a chef.

I asked if we could eat free at her restaurant once she is a Cordon Bleu chef so she said yes, but only the first time – after that I believe we’ll have to pay on subsequent visits (though she mentioned a generously discounted sum) !

She seems to be taking our Finance 101-type talks seriously.

Leave a comment

Filed under Dips,Chutneys,Sauces,Spreads, Easy One Pot Cooking

First among equals -Potato and Peas Poha

I should probably create a special category for  the recipes of the things that the girls like  most and are happy to eat as often as I’ll make them, such as varan, upma, grilled salmon with pesto, any fish baked with a provencal marinade (made of oil, sun-dried tomatoes and herbs) etc.

And poha surely would be the first among those equals.

This is another dish that I learned to cook from my mother-in-law.

Indira, especially, loves it like she does nothing else. So today, when I wanted to persuade Indira to come home for lunch (Noor was going to eat with me anyway, because she has a bad cold and I wanted her to stay at home after lunch to have a nap) because I was worried she would not eat well in the school cantine due to an aching tooth and a mouth ulcer, I suggested that I could make poha. She was quick to agree after that !

With a very few modifications – such as the addition of ginger – the recipe that follows is faithful to Ma’s.

It is food that soothes the soul 🙂

noorniceparkpohacrepes-039

Potato and Peas Poha

3 big handfuls of poha, washed under cold running water and left to drain in a colander for about 15-25 minutes

2 large potatoes, peeled and diced very fine (alternatively, you could use potatoes that have been boiled till soft)

2 medium sized onions, chopped very fine

1/2 to 3/4 cup of shelled, frozen peas

a handful of fresh green coriander, chopped fine

1/2 or 1 tsp of grated ginger

salt to taste

3/4 tsp of turmeric powder

1 tsp of mustard seeds

5-6 curry leaves

In a large frying pan, heat 4-5 tablespoons of oil, then add the mustard seeds. When these start to crackle, add the curry leaves and fry these for a few seconds. Now add the potatoes, reduce the heat, cover the pan and cook the potatoes till they are a little more than half done.

Add the onions, and fry with the potatoes till they are very soft and translucent. Now add the grated ginger and peas, and cook for some more time till the peas appear cooked. Add the poha (after sprinkling a little water on it, and salt) and stir everything together. Cover the pan and leave to cook till the poha is quite soft, uncovering the pan periodically (you will need to do this 3-5 times before the poha is soft enough) to sprinkle a little water over the poha and turning it over well so that it cooks evenly.

Stir in the coriander, and eat it while it is still hot.

This is a basic poha, and tastes wonderful with some plain yoghurt and pickle. Different cooks make it and serve it in many other ways, such as adding other vegetables, serving it with a little sev,  lime juice and/or sugar, etc.

4 Comments

Filed under Breakfast Ideas, Easy One Pot Cooking, Picnic Food, Quick Meal Ideas, Starters and Snacks

Dhokla – A very quick recipe

I have never been able to make good idlis, and so  had never tried to make dhokla either, since typically that would use the same technique of steaming, which I never had much success with.

Until, that is, my friend Pooja gave me this recipe a couple of weeks ago for making dhokla in the microwave. The preparation time is only about 5 minutes, and the cooking time is only about that as well.

The results were good enough that I have made dhokla more than once since and the girls have really taken to it which is great.

Dhokla

Besan (chickpea flour) 1 cup ( or a mixture of besan and suji i.e. semolina in equal or varying proportions)

125 ml of whisked yogurt

some (about 1/4 cup) water

3/4 tsp of grated ginger

1/2 tsp of turmeric powder

2  tbsp of sunflower oil

lemon juice – 1 tbsp

Eno fruit salt – 1 tsp

salt to taste

1/2 tsp of mustard seeds and 4-5 curry leaves (chopped) for tempering

1  tbsp grated (fresh or desiccated) coconut and 2 tsp of chopped green coriander for garnish

Mix the yogurt, the water, the salt, the ginger , the oil and the turmeric powder in to the besan till the batter has a smooth consistency that is easy to pour(but not too runny). Stir in the fruit salt at the end, and pour the mixture immediately in to a microwave bowl after oiling its sides lightly.

Cover the bowl with an airtight lid and cook the mixture for about 4-5 minutes (at about an 800 W setting).  Check, by inserting a knife in the middle if the dhokla is done else cook for another minute. Leave the bowl in the microwave for half a minute before taking it out.

In a small pan, heat a tbsp of oil, then add the mustard seeds and the curry leaves and fry till the mustard seeds crackle. Pour this mixture over the dhokla, spread the coconut and coriander evenly,  then cut the dhokla after a few minutes in to pieces as big or small as you like.

With some coriander chutney, this is just a delicious treat.

Thank you, Pooja !!


Leave a comment

Filed under Breakfast Ideas, Easy One Pot Cooking, Picnic Food, Quick Meal Ideas, Starters and Snacks, Versatile Accompaniments

Daal with vegetables

This is a recipe that evolved from the daals and khichris I used to cook for the girls when they were babies.

The format was usually the same – a couple of vegetables (one green, the other red or yellow) fried with some onion,garlic, sometimes ginger, and tomato, and then cooked together with one of the yellow daals. For a khichri I added rice to that combination.

Of the various combinations I cooked together then, the one I have continued to make over the years is of red lentils (masoor) cooked with spinach and squash/pumpkin.

This is one the girls eat without demur, and the leftover portion is very useful for making dough for puris and paranthas that are full of taste.

I also like the idea that I don’t have to cook a subzi separately, when I cook this daal for a meal,since there is a decent amount of vegetables in the daal.  So yesterday, when I made this daal for dinner, I made only some plain rice and peanut raita to go with it.

Daal with Vegetables

1 cup of masoor (red lentils), washed, and soaked for an hour or two

75-100 gms of very finely chopped fresh or frozen spinach

100-150 gms of finely diced pumpkin/butternut squash (or 2 medium sized carrots)

1 large tomato, finely chopped

1 large onion, peeled and finely chopped

2 cloves of garlic, finely chopped or grated

1/2 tsp of cumin seeds

1/2 tsp of turmeric powder

1/2 tsp of coriander powder

1/2 tsp of garam masala (optional)

salt to taste

3 tbsp of sunflower oil

In a pressure cooker, heat the oil, add the cumin seeds, and fry the onion till it starts to turn a golden color. Add the garlic and the pumkpin, and fry till the onions start to turn brown and pumpkin starts to look quite soft.

Add the tomatoes, and fry till they are soft. Now add the spices, and fry for a couple of seconds.

Add the spinach and the salt, and fry for 3-4 minutes. Now add the daal, 3-4 cups of water, mix everything thoroughly and pressure cook  for 7-8 minutes, or till the vegetables are quite soft.

Add a little boiled water to thin the daal, if it seems to thick, and a tsp of ghee for flavor, if you like.

If you plan to make puris or paranthas with the leftover portion, do thicken the daal over heat first, else you’ll end up using too much flour to knead the dough.

let me know if you try/like this, since this recipe is truly my own 🙂

Leave a comment

Filed under Daals, Easy One Pot Cooking

Spanish Omelette(Tortilla)

All this last week, I have had a solitary red bell pepper sitting among the other vegetables in the fridge and  looking at me -I felt -reproachfully for being left unused.

I usually love red bell pepper in salads, but I haven’t felt like making salad since the weather has turned cold. So I decided this evening to make a Spanish omelette instead, since red pepper makes a healthy, tasty,colorful addition to it. I will use some of it for lunch tomorrow for Noor and me – it is a food she loves. This omelette, called a tortilla in Spain, luckily keeps well for a few days in the fridge, so the rest of it will be handy for dinner for the 4 of us one evening later this week.

You could add meats (such as diced ham) and vegetables to the basic egg and potato combination, to make different kinds of tortilla. Here’s the recipe for my version of it.

Spanish Omelette

6 medium sized potatoes, peeled and cut across in to very fine round slices( I use a food processor to do this; I’d find it a challenge to slice the potatoes as fine by hand)

6 eggs

1 large red bell pepper, cored and diced

2 medium sized onions, peeled and sliced fine

4 tablespoons of olive oil

Heat 3 tbsp of the olive oil very slightly in a large, fairly thick-bottomed frying pan. Add the onions and the potatoes, cover, and leave to cook till the potatoes are soft, over moderate heat. Turn the mixture gently from time to time with a flat/wide cooking spoon, taking care that the onions and the potatoes don’t brown or burn. Try to separate the fine slices of the potatoes – which tend to stick to each other because they are so thin – each time, so that all of it gets cooked. Half way through, add the pepper.

When the mixture is cooked (the potatoes should be soft but not lose all form and become mushy, though they will be smashed up a bit), take it out in to a large dish, and allow it to cool.

Break the eggs in a separate bowl, and season with salt and pepper. Add to the first mixture when it has cooled and stir gently to mix evenly.

Return the frying pan to the heat. Add 1 tablespoon of olive oil, turn the egg and potato mixture back in, cover, and leave it to set, on moderate heat. When the mixture is almost set (this will take about 10 minutes;the middle won’t yet be set but don’t wait for this to happen else the other side will get burnt), turn the omelette over by sliding it on to a large plate, and then leave the other side to set. This will take just a few minutes.

Take it out when it is cooked on to a large serving plate and when it has cooled down, wrap it in cling film to store in the fridge.

This omelette makes a complete meal, with a green salad or soup, and some bread. And since it is easy to carry, sliced up, it is a great picnic food as well. I also make it sometimes for an indulgent, leisurely sort of weekend breakfast.

I am looking forward to my delicious lunch tomorrow, already 🙂

Leave a comment

Filed under Breakfast Ideas, Easy One Pot Cooking, Picnic Food, Starters and Snacks

Noor’s Favorite Tilwale Aloo

Having just documented one of Indira’s favored foods, I feel this urge to be fair and record one of my younger baccha Noor’s favorites too, before I log off for the day.

Actually, we owe their Nanda Mami a big thank you for introducing us to this amazingly simple, but delicious food when she stayed with us for a few days 3 years ago.

It is very versatile, too.  I make this for us to eat with leftover-daal paranthas and raita, or sometimes as part of a first course, to go with a very french salad, when dinner is a more formal affair with guests at home.

And since I am always looking for ways to up the nutrition quotient- the til (sesame) delivers in that department.

A real winner in every way, then !

Tilwale Aloo

500 gms of baby potatoes

2-3 tbsp of sesame seeds

(I tend to add more as I love the crunchy taste)

1/2 tsp of mustard seeds

1/2 tsp of cumin seeds

1/4 -1/3 tsp of turmeric powder

salt to taste

Juice of half a lemon

3 tbsp of sunflower oil

Boil and peel the potatoes. You can try and save time by by trying to find the pre-boiled,peeled baby potatoes available in some places.

In a frying pan, heat the oil (don’t wait till it starts to smoke, though) and add the mustard seeds. When they start to splutter, add the cumin seeds and as soon as these turns a darker brown (which releases their aroma) add the sesame seeds. Do take care not to let the cumin go black – IMO this neither looks nor tastes good .

Stir the sesame seeds periodically till they start to go a light brown, then add the turmeric, the potatoes, the salt, and toss everything together once. Remember not to let the sesame go too brown. This can make the taste almost bitter. Continue to turn the potatoes from time to time, over the next 5-7 minutes. Now add the lemon juice and cook the potatoes in this juice for another 5-7 minutes, till they liquid is all absorbed.

Take off the heat, and toss in some fresh, chopped coriander if you like.

This dish tastes best if it is prepared a couple of hours ahead of the meal, because this allows time for the ptatoes to really absorb the flavors.

Another thing – I find it works better to have squeezed the juice from the lemon into a bowl befor you start, ready to be used, rather than squeezing the lemon directly over the cooking pan. This latter way, there’s a risk of the seeds of the lemon falling in to the potatoes and then ending up in your mouth. Not good…

For  a  “hot” flavor, you could add some chopped green chillies (to taste) along with the mustard and cumin.

Anyway you make it, this dish tastes great !

Leave a comment

Filed under Easy One Pot Cooking, Everyday Subzis, Picnic Food, Salads, Starters and Snacks, Versatile Accompaniments

A Taste of Provence- Vegetable Soup with Pistou

This morning, I was standing in front of the refrigerator, wondering which vegetable to “sort” for the day.

(Note – “Sort” does not mean “to sort out”. It means “to take out”. This is how living in France for 9 years has ruined my English, without making my French fluent. For some years now, I have found myself often thinking in a  melange of the two languages. Oh well…)

I wanted to cook dinner during the morning, since later this afternoon I had to go first to Noor’s playschool for the end of year “spectacle” (I can no longer instantly recall the equivalent word in English ), then to Indira’s to help at one of the games’ booths, part of their end of the year show. And I knew that there would be almost instant demands for dinner on getting back home at around 7pm.

I also wanted to achieve two other objectives – cook something simple, since I wanted to spend some part of the morning cooking ahead for a dinner at our place tomorrow evening, to which we have invited 3 families.

And I wanted to make sure the girls got a good portion of vegetables tonight, since I know from past experience that at these school fetes (hey !! that’s the word, isn’t it !) what they typically enjoy eating is barbecued/grilled sausages,cake, and les frites(french fries).

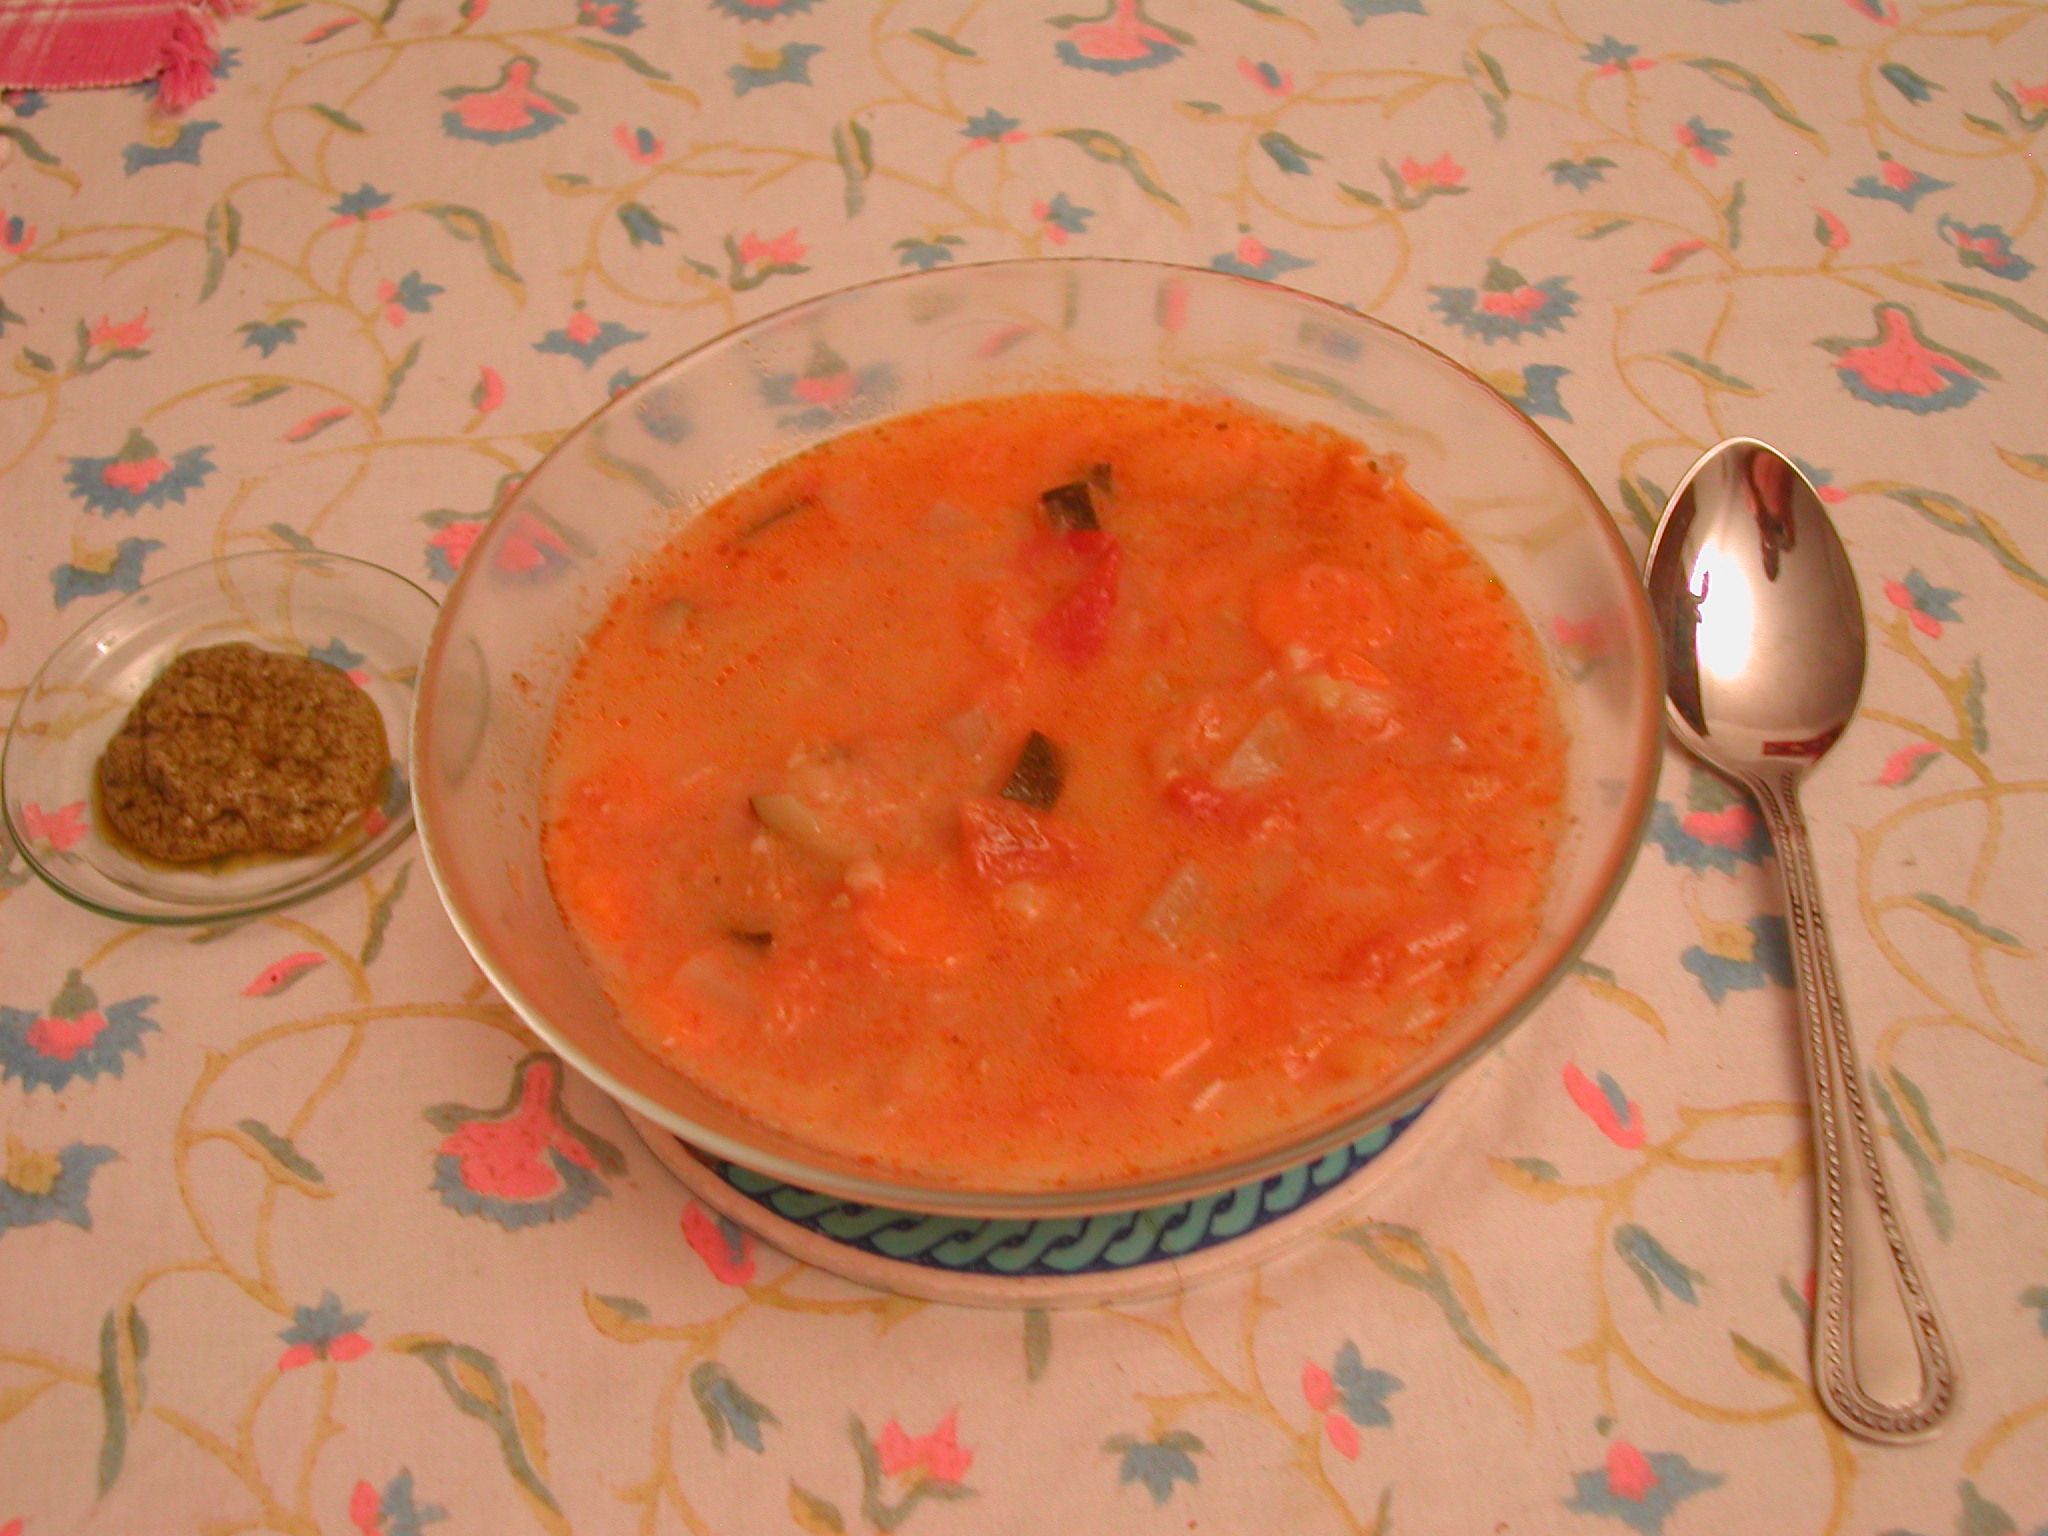
Luckily I saw that I had everything I needed for my variation of  a very flavorful provencal vegetable soup called soupe au pistou, so this is what I made today.

The pistou (available bottled though the fresh paste – made by crushing fresh basil,olive oil, and garlic- is better) is optional, though of course this paste is what the soup derives its name from. My daughters certainly prefer it with a little pistou or pesto -the Italian version of pistou, this paste has pine nuts and parmesan cheese added to the other ingredients – stirred in.

But either way it is full of flavor, light, and wholesome.

Vegetable Soup with Pistou

(Enough for 6-8 adults)

Two leeks, tough portions chopped off

I medium sized courgette(you can substitute green beans,chopped in to half inch pieces, for courgette)

2 small turnips

4-5 tbsp of olive oil

4 carrots

4 tomatoes

2 cloves of garlic

100 gms of vermicelli or any other small wholewheat pasta shape(optional)

1. Remove the tough outer layers of the leeks, and then chop them fine.

2. Peel and chop the carrots in to thin half moons

3. Peel and dice the turnip.

4. Was the courgette thoroughly and dice it without peeling it. This adds to the color of the soup plus I tend to think this keeps more of the nutrition in.

5. Chop the tomotoes into chunks that are neither too large nor too small.

6. Warm the olive oil in a heavy bottomed pan, then sweat the leeks and the garlic on a low heat, taking care not to let either brown at all. After 5 minutes, add the carrots and the turnip, and cook together with the leeks and garlic mixture for about 15 minutes (keep the pan covered so that the vegetables soften in the steam) making sure to stir regularly so that the vegetables don’t burn. If you are using beans instead of curgette, you should add those with the carrots and turnips.

Next,add the courgette and cook everything together again for 5-10 minutes, till the courgette starts to soften. In the meanwhile, boil  approx 1 litre of water in the kettle.

Now add the tomatoes, cook everything in the pan together for 5 minutes, season with salt and black pepper, add the boiled water, put the lid on again, and leave the whole mixture to cook till the vegetables are as soft as you’d like them – 30 minutes to 1 hour. if you want to add pasta to this soup,  add it 10-15 minutes before you are ready to take the soup off the heat, so that it is cooked by the time the soup is done.

This soup develops more flavor if it’s left to sit, after it’s been cooked. That’s another reason I like to cook it ahead.

When everyone is ready to eat, serve some pistou or pesto on the side. Just 1/2 a teaspoon-add more if you like – really adds to this soup’s appeal for a lot of people – and indeed this is the classical way it is eaten in Provence. But I personally enjoy this soup without either paste added to it, since the soup already has a wonderful, delicate taste of it’s own, due to all the vegetables.

Leave a comment

Filed under Easy One Pot Cooking, Quick Meal Ideas, Soups